Showing posts with label rustic. Show all posts

Saturday, January 28, 2017

DIY Chalkboard Fridge


   Earlier this month I have been writing down a list of things I want to accomplish each month with my spinning, home and homestead alongside my husband, I was writing so much that I kept using so much paper I would have to go and purchase some more! 
    
     The problem with that is I would often mix papers that were for short term goals, with long term goals, with grocery list, with menu for the week list, and/or with reminders for the day/week. Phew! That is a LOT of writing and papers and lack of organization, plus the fridge would be covered with so many papers it looked rather silly.

 I finally had this idea, Why not actually use the fridge as my writing material! I can jot down temporary reminders and easily erase when things that are listed are accomplished. That way i'm not wasting money or papers to the bin and it will look so cool and will be fun to do!

 Here is how I did our fridge:

 After much research I realized I did NOT need primer and I definitely didn't need magnetic primer. After searching other blogs and doing my own research, I found out that magnetic primer can cause infertility or miscarriage and my husband and I want children so this was a easy "nope" for me!  Also, it's apparent in the finished picture, that magnets will easily stick to the fridge over the chalkboard paint.
 
  All I used was:

  • Medium sand paper - lightly sanding the surface will help paint adhere to the fridge.
  • Rust-o-leum chalkboard paint - I only used one can and this paint is non toxic
  • 3 inch wide sponge brush (I grabbed 2)
 Everything came out less than $15.00


First, I cleaned fridge with a rag with warm water and dish soap and thoroughly cleaned it off and allowed to dry completely.

 I did sand right after. I could have done so before cleaning but I wanted to take off all the grime stuck to the surface so that the sanding can really get in there with no spots overlooked. When I sanded the fridge I didn't do so vigorously, I just did enough that the glossy look was almost gone. 

 Make sure to wipe off fridge after the sanding part and wash again with warm water and soap and allow to completely dry.


Once fridge was completely dry I then began painting...

 Do not be alarmed to open the can and see blue paint, that is completely normal!

 Stir paint well and with a brush carefully apply your first coat. Be aware that the paint is very thin! After you apply your first coat allow to dry for 4 hours... trust me. You will see that the paint is dry within the hour and will be tempted to to apply another coat right away... DON'T DO IT! I was impatient and waited only 2 hours and reapplied a coat on one corner just to see what would happen.. the first coat began to chip off immediately so I waited after that.

 
 I did 3 coats as I read in other blogs to do so and I wanted to do it right the first time. On the can it says you can use the chalk area after 24 hours, but in every blog I read they say to wait 48 hours... So impatient me I decided to wait only 24 hours and boy... did I regret it.

 I began to season the paint (i'll explain what that is later) exactly 24 hours after last coat and immediately there was chipping happening EVERYWHERE! So I had to stop what I was doing and start allllll ovveeerrrrr. Sigh...

 I started by sanding and now I realized why I didn't need primer because no matter how hard I sanded the paint would not come off  (in the areas I never messed with while I was experimenting). 

 I then did 4 coats of paint (I wanted to really cover the surface well) and did not touch it for 4 hours each application... After the last coat I waited 48 hours before touching.

 Here came the moment of truth, I began to season it and no chipping! 

 This is what seasoning is:

 If you begin writing or drawing on the fridge after the 48 hours without seasoning it you will leave behind a shadow line that will never come off. No matter if you try washing it off it will stay on there.

 When you season the fridge first, you will not leave behind shadow lines when you wipe it clean.


 With a white chalk, using the side of the chalk, begin drawing vertical the entire fridge:

 Then overlap with a horizontal covering (as seen with picture to the left).


    The finished result will look like the picture to the right.
 After you are finished then wipe clean with a rag or paper towel. After I wiped clean then I barely damped the rag with warm water and wiped clean again to not have any chalk residue left behind.


     I hope this will inspire any of you reading this to give this a shot! It was extremely easy to do and fun to do it! 


BEFORE
AFTER

Friday, February 20, 2015

Let it snow, let it snow, let it snow!

Ice Storm February 2015, Tennessee

About 3 months ago my beloved husband and I moved from sunny California (I was born and raised there) to Knoxville, so this is my first Ice storm/lots of snow and I honestly thought i'd be panicking more than I thought! I was a bit nervous when it was happening, but other than that, I enjoyed seeing the aftermath in our neighborhood... It's a White Wonderland!

 So what do you think I did during all this cold? Yup, you got it! Made a whole new batch of dyed tunis/alpaca with some merino wool into the mix!

You know, after carding the already dyed wool, I was wondering, "Is there a way I can spin straight from the carder onto the bobbin?", so after some research and learned of different techniques, I decided to give it a "whorl" (HAHAHA! I crack myself up... C'mon... that was a real knee slapper.), and it was amazing!

Spinning straight from the carder onto the bobbin next to our fireplace in this cold weather... Heavenly!

I will admit, I was quite excited to have found the right technique for me that I asked my husband to record it...


But other than learning this new technique I had the most wonderful time spinning one bobbin (filled it all up!) and now working on my second bobbin in order to ply! The colors are more on the purple hue side with some tinsel to add sparkle! 

I just remember a dream I had not too long ago that I was sitting in a clear field with trees surrounding the field. There was only one tree trunk in the shape of a chair that I was sitting on, it was summer time because I could see I was wearing a summer skirt and top, and I was spinning at my wheel, but there was absolutely no fleece surrounding me, so in my dream I looked closer at what I was so intently spinning and what I saw had me in awe...


 I was spinning the sky! I looked up and saw vivid colors of the sunset on the clouds and I was spinning the clouds onto my bobbin and then the sky grew dark but I kept spinning, and the stars came out and I was spinning the stars onto my bobbin the stars looked like fire and diamonds mixed into the soft yarn made of clouds and the sky!

Twilight (50 yards) click on photo to be redirected to my Etsy Shop


I remembered that dream that the Lord gave me, and I was inspired by it and wanted to make something like what I saw in my dream... of course there is no stars, fire, or diamonds on this yarn... but there is sparkly tinsel! Close enough, eh? 


But beside all that I loved having fun in this cold wonderland! But I will admit one thing... Goodness I can't wait for spring!!!!!


While many are drinking hot coffee or hot chocolate, I drink an ice cold slushy during this ice storm... I too like to live dangerously!


I must brag about my beloved! He is so creative!!!! He is really interested in wood art/carving and this is what he made:


He burnt our last name into the wood a few months ago, but just recently he found what he wanted to burn above our name! Our home state and under the star he burnt it says "Home".


                                       and,


He made the shape of Tennessee from a wood pallet and burnt the words on it!

These two AWESOME items he created looks beautiful on our mantle!


No better way to end a cold day than cuddle on the couch with the fire on, snow falling from the sky outside, and our sadie girl snoring peacefully inbetween us on the couch as we have our family devotions! 


Saturday, February 14, 2015

I'm DYEING to PLY! Lousy joke... I know.

Both dyed yarns being plied together! Gorgeous!
Last post I showcased the carding, blending and dizzing, now comes the part i've been waiting to do and share with all who are reading... the dyeing and spinning! Good golly, miss molly! I'm excited!

 All right, so after dizzing my wool into roving I at first was going to dye it then spin it. But before all that I forgot to add that I test dyed a batch of roving I made and all the softness and perfectness of the roving was a mess! I have to re-card to get the softness back. But, I wasn't sure if it was "me" that maybe messed up the dyeing process of that test batch, so I decided to be more careful about it in the next batch... 

As I was getting things prepped to being the dyeing procedure, a light dawned on me... "Elisa" I told myself, "You don't know what you are doing. So why not ask people who have done this before!" Well, that seems smart! So I put down what I was doing (to the relief of my soft perfect roving) and went on my laptop to the most awesomest sight I know! Yes... "awesomest" is a word in the dictionary of "Elisa" established 2015. 

I went to Home Steading Today , and there I asked the fiber arts people, should I dye before or after spinning? I explained my situation, and promptly I was blessed with wise responses! Pretty much they said, "Do not dye after you have carded and dizzed into a roving. Because all that work will just go to waste. Either dye after you washed the raw wool and before carding/combing. OR dye after you spun already carded/combed wool." 

 If unsure always ask!

 I was more than happy to postpone the dyeing process, because I was itchin' to spin!

 Because I want to spin for the spring/summer seasons coming up, I didn't want to spin bulky yarn of any sort, I really wanted to strive for fingering weight. So I needed to spin single lace weight so when they are 2 plied I can achieve fingering weight. How on earth could I achieve that?  With this:


Rosie's Precise Spinning Control Card

This helped me keep consistent on how thin or thick I want to spin my yarn. At this point in time i'm not looking to spin "Art" yarn, but consistency in texture and looks! This card is something I believe every spinner should have on them, next to them, in a place you can grab because you will use it!


Lace weight singles

After spinning an awesome amount I got to experience first hand what alpaca/tunic processed all the way by hand feels like spun... it is so extremely soft and springy, meaning quite a lot of elasticity and strength at the same time!


In it's natural color

After I spun, I got the dyes ready. I wanted to mimic something natural. I love taking photography, so I remember seeing this gorgeous birds nest and some moss lying around the ground and those colors just popped in my mind and I had the dyes to try and mimic those same colors! 


Photo I took that inspired me.

So when I dyed the first batch of single yarn, I didn't keep it in the water soaking the dyes for very long. I didn't want it "vivid" but mossy/bird nest like color:


I left it to dry, and began to spin my second bobbin. This time I left it to simmer longer in the dye to give it a stronger green. Here is what I used to dye my yarn:


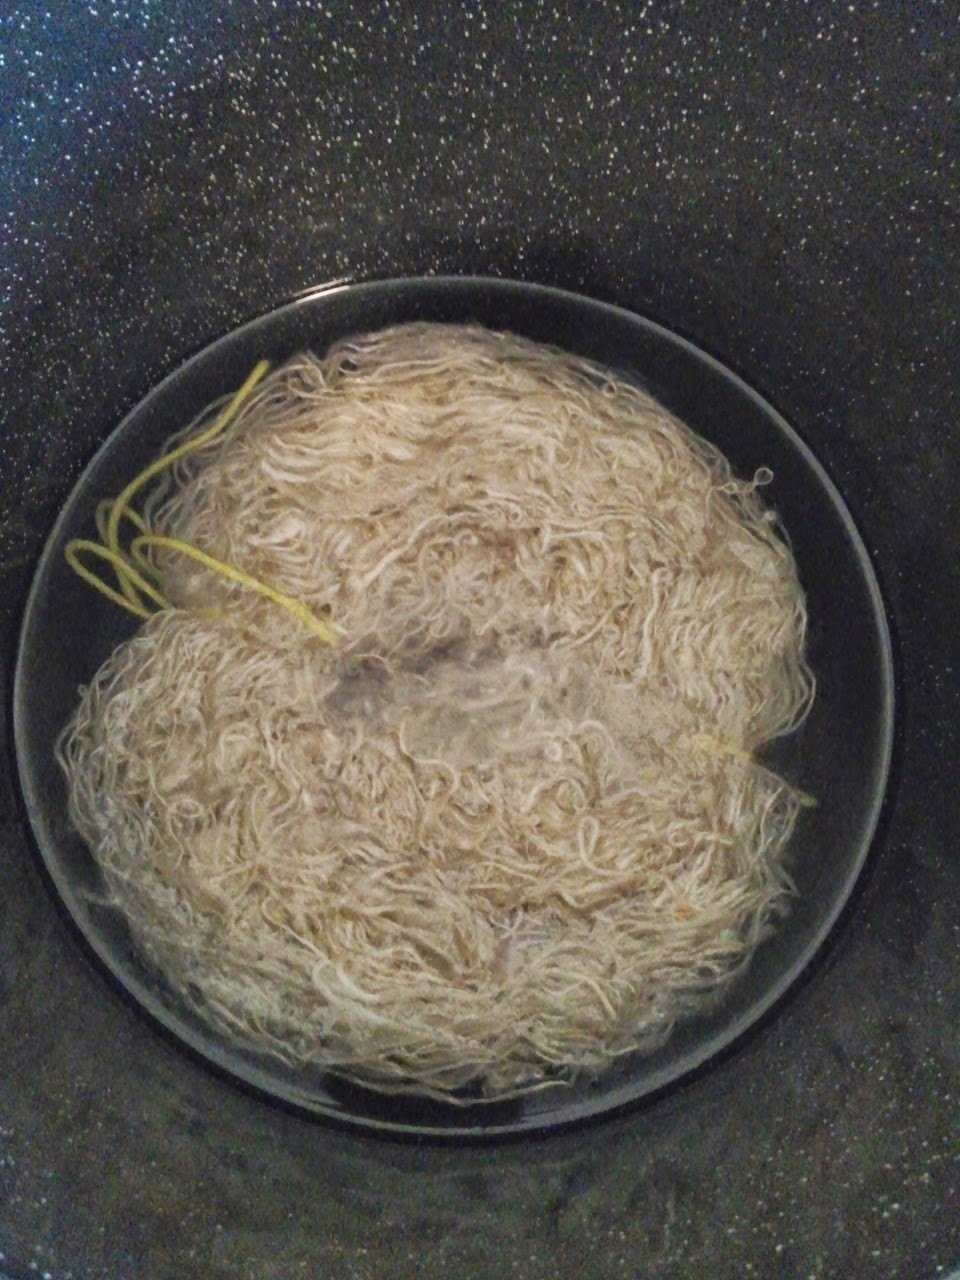
Before I dye the yarn, I let it soak for up to 2 hours. If I was dyeing roving it would be much shorter than that, but because I spun it, I need to make sure all air bubbles are out so that my fiber is completely soaked so that the dye can penetrate and no "white" spottings anywhere, that's not what i'm going for.


Left to soak for up to 2 hours)

Less is more when adding dyes! First add vinegar then dye away!

Once the water was simmering, the dyes began to go to work, I let it set for about 15 minutes, making sure the water did not boil (if it boils for too long, your fiber WILL felt. ).

I made sure the water was "clear", meaning that when I poked my dyeing spoon in there I could actually see it in the water. That means the dye is stuck to the wool.

Carefully I took out the yarn and with warm water (I didn't use cold water, because drastic change of temperatures from extremely hot to cold will also felt it) and gently squeezed out the water and let it dry.


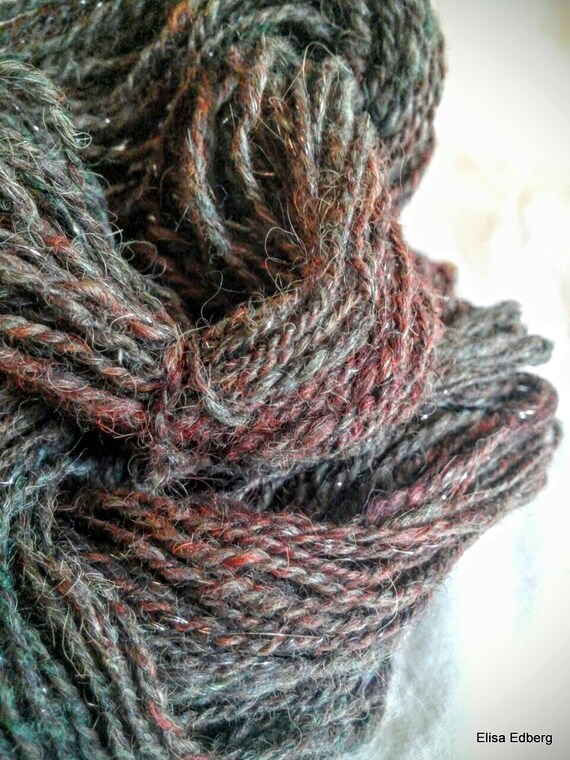
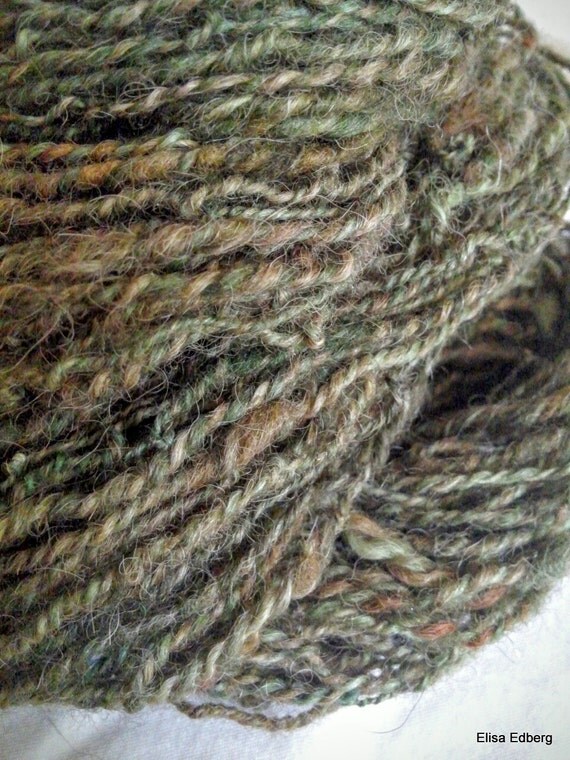
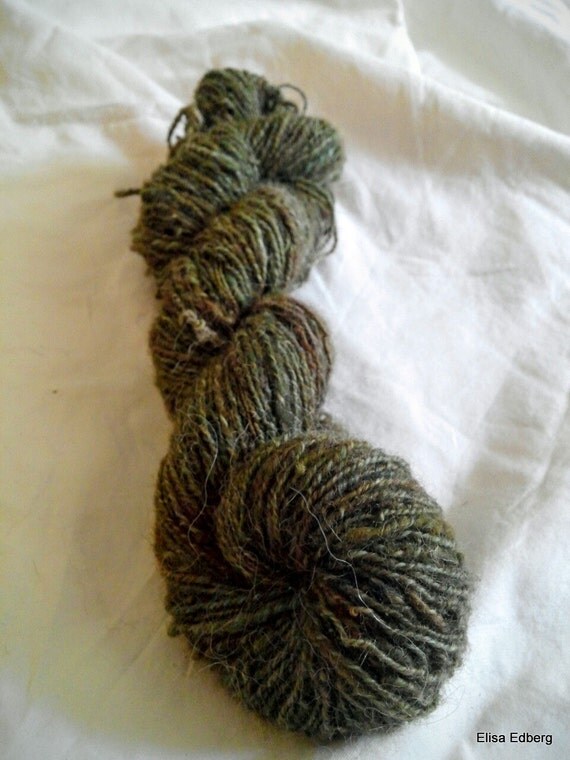
After making sure the yarn was COMPLETELY dry, I went to work! Plying! It is soooooo much fun, if you know what you are doing. If you don't, you may catch yourself in a tangled mess or bumpy yarn when you really want it smooth! The colors came out very lovely and rustic and a natural that pleases me immensely!
Mossy Nest ( 60 yards ) click to be redirected to my Etsy Shop


Mossy Nest (80 yards) click to be redirected to my Etsy Shop