Friday, February 20, 2015

Let it snow, let it snow, let it snow!

Ice Storm February 2015, Tennessee

About 3 months ago my beloved husband and I moved from sunny California (I was born and raised there) to Knoxville, so this is my first Ice storm/lots of snow and I honestly thought i'd be panicking more than I thought! I was a bit nervous when it was happening, but other than that, I enjoyed seeing the aftermath in our neighborhood... It's a White Wonderland!

 So what do you think I did during all this cold? Yup, you got it! Made a whole new batch of dyed tunis/alpaca with some merino wool into the mix!

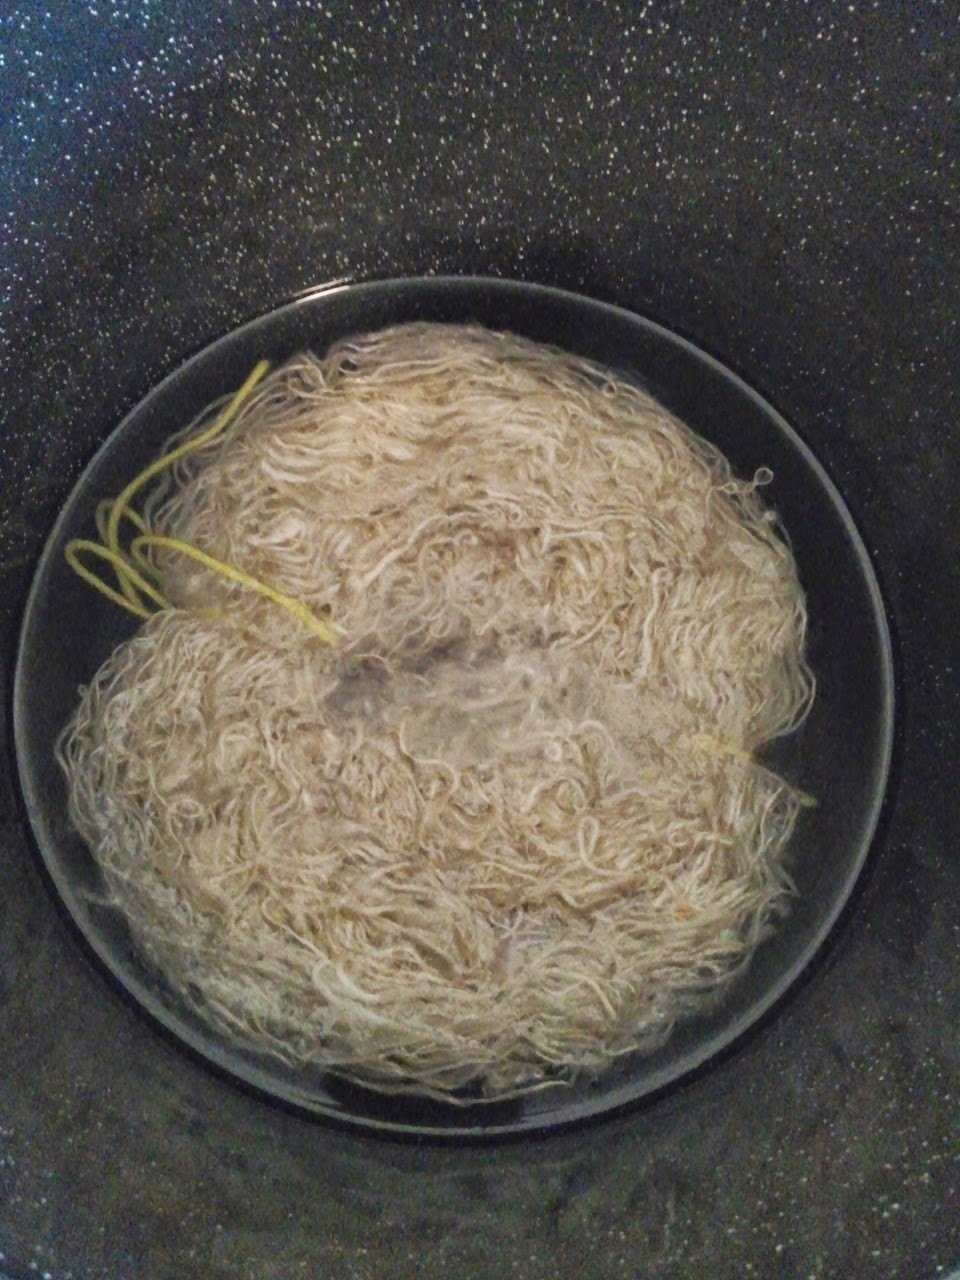
You know, after carding the already dyed wool, I was wondering, "Is there a way I can spin straight from the carder onto the bobbin?", so after some research and learned of different techniques, I decided to give it a "whorl" (HAHAHA! I crack myself up... C'mon... that was a real knee slapper.), and it was amazing!

Spinning straight from the carder onto the bobbin next to our fireplace in this cold weather... Heavenly!

I will admit, I was quite excited to have found the right technique for me that I asked my husband to record it...


But other than learning this new technique I had the most wonderful time spinning one bobbin (filled it all up!) and now working on my second bobbin in order to ply! The colors are more on the purple hue side with some tinsel to add sparkle! 

I just remember a dream I had not too long ago that I was sitting in a clear field with trees surrounding the field. There was only one tree trunk in the shape of a chair that I was sitting on, it was summer time because I could see I was wearing a summer skirt and top, and I was spinning at my wheel, but there was absolutely no fleece surrounding me, so in my dream I looked closer at what I was so intently spinning and what I saw had me in awe...


 I was spinning the sky! I looked up and saw vivid colors of the sunset on the clouds and I was spinning the clouds onto my bobbin and then the sky grew dark but I kept spinning, and the stars came out and I was spinning the stars onto my bobbin the stars looked like fire and diamonds mixed into the soft yarn made of clouds and the sky!

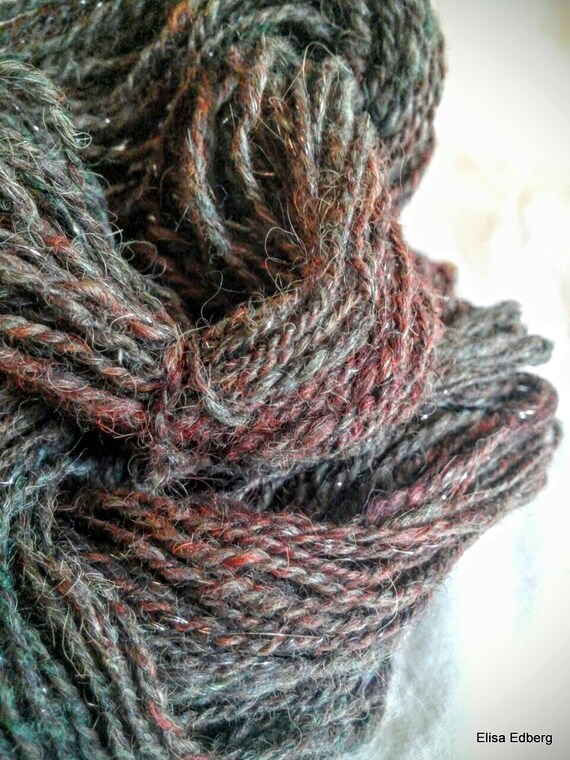
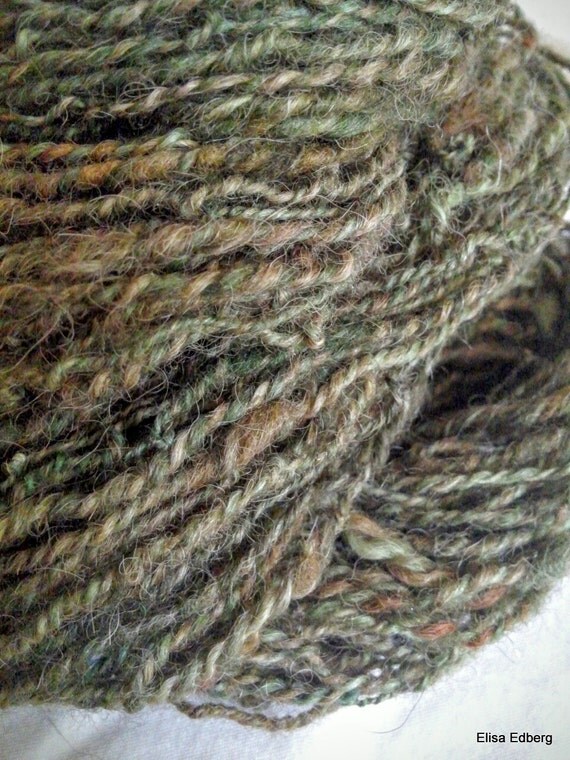
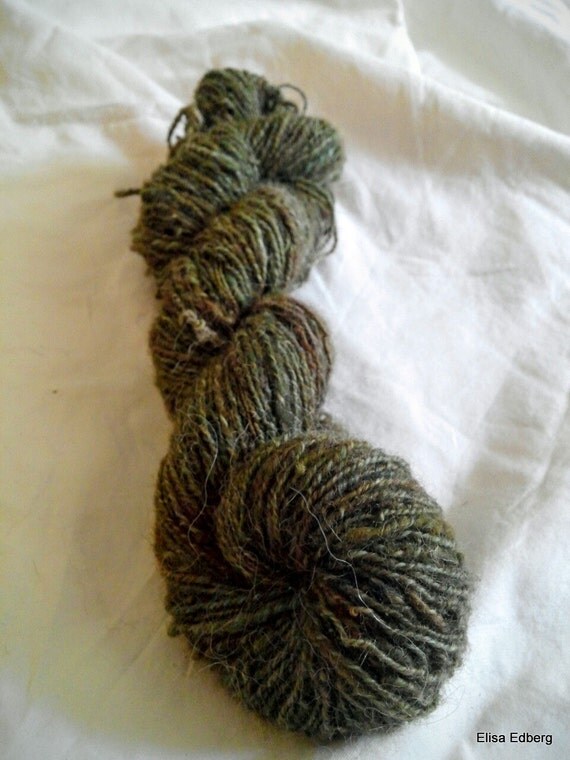
Twilight (50 yards) click on photo to be redirected to my Etsy Shop


I remembered that dream that the Lord gave me, and I was inspired by it and wanted to make something like what I saw in my dream... of course there is no stars, fire, or diamonds on this yarn... but there is sparkly tinsel! Close enough, eh? 


But beside all that I loved having fun in this cold wonderland! But I will admit one thing... Goodness I can't wait for spring!!!!!


While many are drinking hot coffee or hot chocolate, I drink an ice cold slushy during this ice storm... I too like to live dangerously!


I must brag about my beloved! He is so creative!!!! He is really interested in wood art/carving and this is what he made:


He burnt our last name into the wood a few months ago, but just recently he found what he wanted to burn above our name! Our home state and under the star he burnt it says "Home".


                                       and,


He made the shape of Tennessee from a wood pallet and burnt the words on it!

These two AWESOME items he created looks beautiful on our mantle!


No better way to end a cold day than cuddle on the couch with the fire on, snow falling from the sky outside, and our sadie girl snoring peacefully inbetween us on the couch as we have our family devotions! 


Saturday, February 14, 2015

I'm DYEING to PLY! Lousy joke... I know.

Both dyed yarns being plied together! Gorgeous!
Last post I showcased the carding, blending and dizzing, now comes the part i've been waiting to do and share with all who are reading... the dyeing and spinning! Good golly, miss molly! I'm excited!

 All right, so after dizzing my wool into roving I at first was going to dye it then spin it. But before all that I forgot to add that I test dyed a batch of roving I made and all the softness and perfectness of the roving was a mess! I have to re-card to get the softness back. But, I wasn't sure if it was "me" that maybe messed up the dyeing process of that test batch, so I decided to be more careful about it in the next batch... 

As I was getting things prepped to being the dyeing procedure, a light dawned on me... "Elisa" I told myself, "You don't know what you are doing. So why not ask people who have done this before!" Well, that seems smart! So I put down what I was doing (to the relief of my soft perfect roving) and went on my laptop to the most awesomest sight I know! Yes... "awesomest" is a word in the dictionary of "Elisa" established 2015. 

I went to Home Steading Today , and there I asked the fiber arts people, should I dye before or after spinning? I explained my situation, and promptly I was blessed with wise responses! Pretty much they said, "Do not dye after you have carded and dizzed into a roving. Because all that work will just go to waste. Either dye after you washed the raw wool and before carding/combing. OR dye after you spun already carded/combed wool." 

 If unsure always ask!

 I was more than happy to postpone the dyeing process, because I was itchin' to spin!

 Because I want to spin for the spring/summer seasons coming up, I didn't want to spin bulky yarn of any sort, I really wanted to strive for fingering weight. So I needed to spin single lace weight so when they are 2 plied I can achieve fingering weight. How on earth could I achieve that?  With this:


Rosie's Precise Spinning Control Card

This helped me keep consistent on how thin or thick I want to spin my yarn. At this point in time i'm not looking to spin "Art" yarn, but consistency in texture and looks! This card is something I believe every spinner should have on them, next to them, in a place you can grab because you will use it!


Lace weight singles

After spinning an awesome amount I got to experience first hand what alpaca/tunic processed all the way by hand feels like spun... it is so extremely soft and springy, meaning quite a lot of elasticity and strength at the same time!


In it's natural color

After I spun, I got the dyes ready. I wanted to mimic something natural. I love taking photography, so I remember seeing this gorgeous birds nest and some moss lying around the ground and those colors just popped in my mind and I had the dyes to try and mimic those same colors! 


Photo I took that inspired me.

So when I dyed the first batch of single yarn, I didn't keep it in the water soaking the dyes for very long. I didn't want it "vivid" but mossy/bird nest like color:


I left it to dry, and began to spin my second bobbin. This time I left it to simmer longer in the dye to give it a stronger green. Here is what I used to dye my yarn:


Before I dye the yarn, I let it soak for up to 2 hours. If I was dyeing roving it would be much shorter than that, but because I spun it, I need to make sure all air bubbles are out so that my fiber is completely soaked so that the dye can penetrate and no "white" spottings anywhere, that's not what i'm going for.


Left to soak for up to 2 hours)

Less is more when adding dyes! First add vinegar then dye away!

Once the water was simmering, the dyes began to go to work, I let it set for about 15 minutes, making sure the water did not boil (if it boils for too long, your fiber WILL felt. ).

I made sure the water was "clear", meaning that when I poked my dyeing spoon in there I could actually see it in the water. That means the dye is stuck to the wool.

Carefully I took out the yarn and with warm water (I didn't use cold water, because drastic change of temperatures from extremely hot to cold will also felt it) and gently squeezed out the water and let it dry.


After making sure the yarn was COMPLETELY dry, I went to work! Plying! It is soooooo much fun, if you know what you are doing. If you don't, you may catch yourself in a tangled mess or bumpy yarn when you really want it smooth! The colors came out very lovely and rustic and a natural that pleases me immensely!
Mossy Nest ( 60 yards ) click to be redirected to my Etsy Shop


Mossy Nest (80 yards) click to be redirected to my Etsy Shop


Thursday, February 12, 2015

The joys of blending in!

Cleaned alpaca (left) and tunis (right) wool with hand carders in the center.


I can't tell you the relief and giddiness I felt when I took the above picture! I was DONE with cleaning and picking out the VM and waiting for the wool to dry, now, I can begin the next process which is: blending both wool together.

 If it wasn't for youtube and other blogs and articles I would have no idea what I was doing! But now, it was my turn to do the deed! So... I began!

When I first started blending by putting alpaca wool on the bottom edge of one carder and lay tunis wool on the top, it was a mess. Cos the alpaca was much stronger than the tunis, the tunis just slid off but wasn't grabbing the alpaca to slide with it onto the next carder. It was like trying to blend water and oil, they were still separating! 

So recognizing that, I decided to switch how I was placing the wool on the hand carder:


 On the above photo you see that I placed the alpaca wool at the edge of the carder.


On the photo above you will see that I placed the tunis wool behind the alpaca, as tunis is the more weaker of the two.


After gently carding the wool, as you see in the above photo, look how absolutely beautiful and well blended the wools are together! Yes, I shall wait until the applause has died down to move on! No, please... continue! Hee Hee!

After carding I rolled them into loose rolags to later blend even more!
loosely rolled rolag


bundle of rolags ready for the next process!
Another step, Elisa? Why not just start spinning straight from the rolags? Because even though it looks well blended, there was still some separation I could notice up close! And because my goal is to sell the yarn I spin from this wool, I want an amazing quality, and I want to make it as perfect as possible, even if it means putting in another step that is "unnecessary", but i'd rather be safe than sorry!

My next step? Blending hackle!

 My darling husband made this blending hackle for me for under $20 (with the help of my daddy who was here with my mama!), to buy a good blending hackle would cost up too $200!!! So, he made one for me instead! 

I put the rolags on the hackle for dizzing...
For a dizzer I used to use a small hole washer you can get at home depot for around a $1. But I would get frustrated with it, because the smallest hole they had wasn't small enough, yes, the wool would clump together but right when they went through the washer they would just loosen up so I wasn't getting a strong "true top" roving!

So, I improvised for free! I went to my cooking cabinet and took out the top of a lemon and pepper container and used the center hole as my diz!

My new diz!

 When dizzing you must be very careful... it's not about strength (or else you'll rip apart your wool and also pull down the nails in your homemade hackle!), it's about technique in pulling your wool into the diz to make it into roving!

dizzing

Look how strong and smooth that roving looks! The lemon and pepper container top really improved the results of my work! I had to have a "feel" for it to get the right results!

After dizzing from the hackle
The results of the aftermath of picking VM, washing, drying, carding, blending and dizzing is the most satisfying feeling ever! Here is the results of all that work! a rolled up true top roving!

Next post will focus on the spinning and dyeing! Stay tune!!!

Sadie thought she wouldn't get caught sniffing too close to the wool! She looks a bit confused and shocked she got caught and is given a lecture. As you can see, we knew what she was doing cos of the evidence on her snout! She's giving me that look that says, "Well, you see... what had happened was..."

" Ma... before I get in big trouble I really want you to know... I really love you... ok? "

The Alpaca's are coming! The Alpaca's are coming!


Last post I shared how blessed I was to have a husband who took me to Kentucky to visit The Woolery and there purchased 5 pounds of raw Tunis sheep wool! 

The tedious work of cleaning, and clearing VM from the fleece and going back a second time to clear more VM was driving me crazy! I just wanted to be finished with it! So what did I do to ease my frustration? Quit? By means no!... I went and bought 5 huge bags of RAW Alpaca wool! What can I say, I love challenges in what i'm passionate about! 

What happened was I was reading my Bible one morning and just soaking in the presence of my God when I looked down at all the tunis wool that was halfway done with being cleared of all the VM I can possibly do by hand and just prayed, "Lord, I desire greatly to blend this wool with something like alpaca to add some strength and elasticity to it.", because alpaca wool would give it strength and elasticity and extra softness! But because of finances, there was no way I can purchase alpaca wool. 

That evening a sweet friend from our church group told me that she saw on craigslist a lady selling raw alpaca fleece. 

Immediately I went online and saw the wool in big bags and thought, "surely, it will be quite expensive per bag!", but she was selling each bag for $10!!!!! It was from her own alpaca she sheared herself!

 After talking with my husband he said, "yes" to purchasing all of them. We went to their beautiful home and had $60 in 20's meaning we needed $10 in change. no one had that change so she said, "Eh, it's no big deal. you can take them for $40."! Praise God!!!

So on the top photo you see our Sadie Girl posing with my bounty! She's giving me a look that says, "First the Tunis wool, now this alpaca... hmmm, am I next? You may need an intervention, woman." Ha Ha!


Cleaning the alpaca was heavenly! First, alpaca doesn't have lanolin like sheep wool does, thus when you touch it you won't feel any grease at all, just very soft and dusty wool, because alpaca absolutely loves the dust!

So cleaning it was so FAST! Just had to spread the fleece out, pick out any VM (which is another thing I was blessed to have... an A Grade fleece! Meaning hardly to non VM) and take out short stample length and then begin the wash (same as I washed the tunis).

a decent sized stample length

Unlike the tunis, when it came to washing I was extremely confident! I first soaked the fleece for 30 min. in the washer, then drained, then soaked with Dawn soap for another 30 min. Then I drained and soaked to get all the soap off for another 30. then spun and let out to dry. Because it has been so cold and cloudy, the drying took a lot longer which gave me time to pick VM from the remainder of my tunis! Next post will be blending both together!