Saturday, August 1, 2015

My First Prim Doll... Violet!


Violet

  There is something about being getting married.

 When I was a  child to young teen years, I was quite a tomboy. I disliked craft making, I hated to cook, and I only wanted to play soccer. Soccer was my idol at that time and I only wore pants and t-shirts, you wouldn't catch skirts or dresses on me!

 My mama was (and still is) extremely creative! She made dolls, sewed clothes, decorated our home in the most cozy fashion that any time someone came into our home they would pause and drink in the atmosphere she created with their eyes, nose (her home always smelled of fresh from the field lavender in the spring and summer, and pumpkin and cinnamon in the fall and winter), and spirit/soul! I always had a deep admiration for my mother's creativity... and little did I know that I had that same creativity.

 I didn't allow my creativity to flow because I was somewhat shy with it and didn't think it was much... How I wish I could go back in time and slap myself for not allowing myself to be all that I can be... no not in the Army, i'm too much of a wimp to be yelled at in bootcamp. Heehee!


I think I would react like that spoiled man child in the hilarious skit (video) by Abbott and Costello if I ever had to join the Army! I'd react like he did at 5:45 and 6:12 (minute mark) if I was ever yelled at by a drill sergeant! This video is VERY low, so please turn up your volume! Whenever I watch these type of videos I remember fondly my brother and I would re-enact their skits down to the dot!

 Anyways, at around turning 18 I went from a tomboy to complete femininity over night! I wore makeup, made my hair look nice and I wore girly clothes and my confidence boosted higher and higher... but still, my creativity was at an ultimate low.

 Little by little I realized I had a very strong sense of creating something out of "nothing" whether it be a skit, a song, playing music on my guitar by ear (I didn't know how to read notes), scrap booking, etc... I did have times where my creativity scared me, because I didn't know how strong I had it!

 It was after I got married that I decided to allow my creative juices to flow freely!

 I decorated our first apartment together (In Hawaii) in a Moroccan/Safari style. That apartment was extremely tiny and it looked like an asylum when it was empty, very cold and not very cozy! After I finished decorating we invited a friend over who brought a coworker to visit for a short while, and when she came in, she paused at our front door and looked around slowly and said, "You can tell a woman lives here. There is such warmth and beauty here." That made me smile so big!


My first home as a married woman leaving my parents home that I decorated myself!
I loved this small area! I felt like I was in Africa!

  That was a first for me,to decorate my own home as the Lady of the Home! That wasn't a first, I learned shortly after to crochet, and caught on very quickly that immediately I began to crochet my own designs:


Fingerless glove I crocheted with my own pattern


Another first for me is spinning my own yarn!


My very first blended roving made on a blending hackle my husband and my dad made for me!

my very first yarn I ever spun from my roving from the picture above!


There is always a first for everything, especially if it's something you are so interested in! I love anything country, rustic, Americana, handmade with love and warmth and a touch of country pride and American made! So I began to fall in love with Prim Dolls! It has that charm that I absolutely adore! How dearly I wanted one, and would sigh and think, "I wish I could make one."


Wait a minute... why can't I?

I have a sewing machine... it was gathering dust. I tried to be interested in clothes making, but I lost interest extremely quicky, and I only sewed if I needed to hem something up... like a button.
 But I sincerely wanted to make a doll... and so I went to the back room and brought out the sewing machine, blew off the dust, stared at it and stared at dolls like the photo below I would gaze at in admiration on Pinterest and wondered... what now?


 Before I start anything full on, I have to know what i'm doing by going on youtube, pinterest, blogs and watch/read as many tutorials as I can. Because if I just jump in something without even a clue on how to begin, I get frustrated and toss the whole project to the side and move on to the next thing!

 So I watched and read as much as I could take in and understand. I made a list on what I needed to make the body of my doll and away I went to Joann's to shop for some muslin fabric... I was in luck! The fabric I got was pure white and extremely cheap per yard! I already had black alpaca wool doing nothing but taking up room in the back room to stuff the doll, so I got what I needed and when I arrived home I began.


Of course I had no idea what I was doing, so I wanted to be as simple as possible and create from the heart... Just like food, if you create while anxious, uptight, upset, with a negative or worrisome attitude, it will come out in what you are creating! No matter how my doll would come out, I was going to start it out with love, patience, warmth, gentleness and kindly work with my fabric!

I traced out a simple body, with two legs, and two arms. I already knew what she looked like in my mind, but drawing it down took me a very long time. I first drew her on paper (it took me a LOT of paper to finally get the body right). I cut out the tracings and traced her again on the muslin  (double layered) with a simple pencil I had.

I then pinned the tracings down before I cut the patterns (not perfectly as I was just going to sew the patterns together and once done turn them inside out.
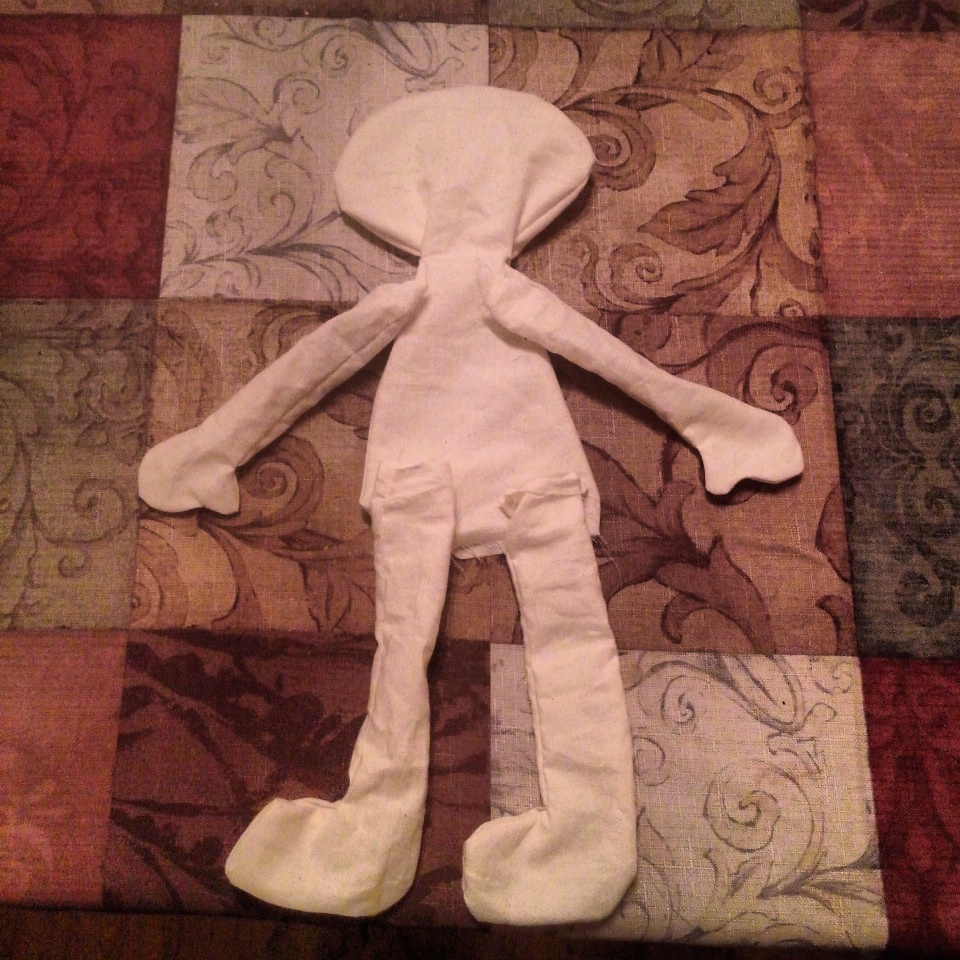
The doll isn't stuffed or sewed together in this photo, I just placed the patterns together to see how it would look.


After I sewed the parts, I got some leftover coffee and soaked the fabric in it for a good 5 - 8 minutes. After soaking, I wrung it out and put in microwave on high for 1 minute (keeping an eye on it so the fabric wouldn't burn) for the coffee to permanently stain the fabric.

After that happened and everything was completely dried, I began to stuff the doll. Not too tight and not too loose, just enough! I used raw alpaca wool as it doesn't have any lanolin, so it's not greasy at all (or else I would have washed it beforehand), it's just dusty (which I dusted off beforehand) and extremely soft... and there was something comforting and country that I like about the smell of raw alpaca wool! How primitive can one get? HeeHee!


After stuffing as much as I could, I sewed up the doll (the arms I did by hand) and I absolutely loved my doll already!!! I was searching around online for ideas on the eyes and nose (the mouth I left for later) and found many ideas,so I incorporated ideas with a tiny bit of mine and began to practice drawing eyes and noses on scrap paper to see what matched her.


You have no idea how much scrap paper I have tossed! But it was so much fun and it built my confidence to start designing her face... because Lord knows how completely scared I was to start directly on the doll and mess up!!!! So before I began designing, I took more muslin fabric, made a quick circle, sewed it, stuffed it and sewed it up tight to practice on it as if it was my dolls face!

I practiced on both sides of the practice doll to get different ideas... I didnt want a completely flat face, I wanted an almost 3D nose. So I began to study on needle sculpting online! After getting the idea I took a simple sewing needle (I didn't have a doll needle) and fishing line (as you need a strong thread. I didn't have crochet thread, or quilting thread, but I did have a thin fishing wire that would disappear into the fabric!


I needle pointed 3 type of 3D noses: on the top left is just simple line you would expect on a prim doll, below that was a "W" nose that I kept the base open to have a slight line go up toward the eyes... and after that I closed up the base to have just a button nose (top right). I liked the "W" design better.... so I got to work... I took a very deep slow breath, and prayed (I did really. haha I was that nervous!) and very slowly and lovingly got to work!


It came out PERFECTLY!!!!!After I did the nose, I then extremely carefully traced out the eyes on the doll and look! This was the exact face I wanted!!!! I showed my beloved and he said "Awwwww! It's so oochie-boochie-boo-boo!" That is what I say when I see something cute or a darling baby! Ha ha I rubbed off on him!

Then it was making the dress time...dun dun dun duuuuuuuuunnnnn...

I kept looking online for some ideas or free patterns. The only pattern I found that was simple enough to be on a "How to make a prim doll dress pattern for dummies" was literally just something like this:


After staring at my paper traced dress, I decided to brave it and take out my fabric. It was an old bed sheet (washed of course) I purchased from Goodwill for only $2. So away I traced (with a pencil) on my fabric with the help of the pattern on paper.


It looks simple enough right? All I have to do is sew on the wrong side of the fabric and slip the doll in. I did that, and it did work... but I didn't like it. I realized that we may not notice it, but when someone takes their time and carefully and lovingly sew something like a dolls dress, they don't do things the "easy" way (like sewing the dress in one smooth motion), they sew the bodice then the sleeves seperately. So I decided to take my time and separately sew the bodice from the sleeves.


What an amazing difference!!!!! After I took my time tracing the bodice and sewing it, it fit my doll beautifully with no baggy or too snug spots. I very gently fashioned the sleeves to add some very small flairs and sewed them.

Majority of the time I used my sewing machine, and when needed I sewed by hand. You may find this hard to believe, but i've never hand or machine sewn anything creative. I only sewed by hand when fixing a clothing item or needing to add a button. And on the machine I knew how to sew a straight line seam if I REALLY had to, which was never.

 My mama taught me how to use the sewing machine as a child to teenager, but she literally had to make me sit still and sew. Like I said before, if I could avoid it (back then) I would! My mom finally gave up because I had absolutely no interest, but not without instilling in me knowledge on how to use a machine, because she knew... my mom knew I would need all that teaching one day. Isn't she wise?

Shout out to you, Mami!


 After the dress, I decided to make mini dress samples and an apron sample and add crochet border to the hem and see how it would look coffee stained.
I used two yarns: a 50/50 merino/mohair and a simple crochet thread.


Before staining.

After staining
       
Obviously, the crochet thread dyed much better than the mohair, but I just wanted to see how it came out out of curiosity.
After I saw which yarn looked better with a coffee dyed dress, I began to add a scallop border to my dress with a picot to add some classic flair to it.
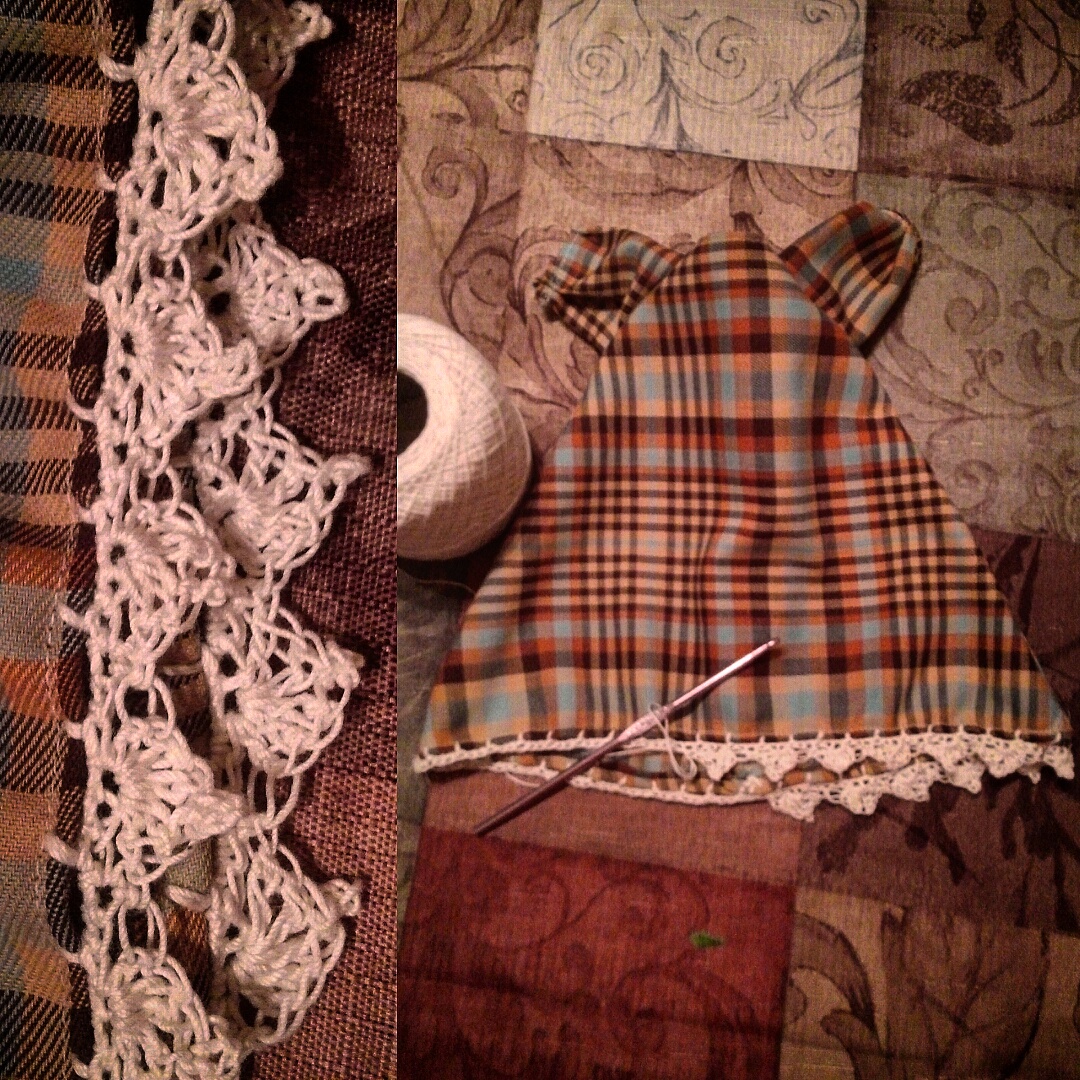


Then it was time to make the apron, now that was very easy! But still, I wanted to take my time and measure and make sure it looked even!


 Making the apron strings was super easy to sew! I just sewed on the wrong side in a straight line and bam, was done... oh... wait... I have to turn it wrong side in. Dang it.

Ok no problem, it won't be too hard, right? Ha!

So I tried just trying to use my fingers, and that didn't work, I tried using a pen... nope. I tried using my crochet hook... It was mocking me... So I  tried slapping it on everything I saw and choked it with all my might and threatened it that I would feed it to Sadie girl if it didn't cooperate (which Sadie's ears was perked up with a look that said, "You serious? Don't play.")... That also didn't work, for some odd reason.

 I sat there and finally came with a brilliant idea! It was so brilliant that I had those strings wrong side very quick! All I needed was the fabric i'm working on, tapestry needle, crochet thread, and tweezers:


I took my tapestry needle and tied a knot at one end:


I then went through (on one end) the string with the needle:


I then pulled the thread until I hit the fabric. then with tail end of the needle facing down, I pushed the needle all the way to the opposite end of the string:


Then once I took away my needle, and with my tweezers I  pulled the fabric all the way down the tweezers (looks like a scrunchy):


  Until I reached the very end, and grabbed with my tweezers the crochet thread at that end and began to slowly and gently pull it while folding the rest of the fabric over it:


Then once I can see the crochet string (about 1/4 after folding inward) I just grabbed the string and pulled and helping fold the fabric along the way, and it pulled itself inside out!


The longest thing that is delaying from finishing my doll so far is embroidering. At first, I just wanted to keep the apron simple, maybe cut out a heart shape fabric and sew it on, but I dont want my doll to look extremely simple! I want her to look warm, sweet and complete! So I decided to embroider words onto it...

I've always loved the song "You are my Sunshine", and after getting married, my husband and I would randomly break out singing it together... it was our little way of showing each other love wherever we are! One day we saw a video of an older gentleman who was in so much pain in the hospital that he felt as if he should die from the pain he was feeling (thankfully, he is fine now from what i've read), so he asked his darling wife to come close to him and they both serenaded eachother "You are my Sunshine", it was the most intimate and precious thing I beheld! That this song became even more precious to me when my husband and I sing it to each other together, so I decided to embroider some of the words onto it to add a piece of our love onto the doll!

I'm still in the process of finishing it up, I still have to embroider "Away" but you get the idea!
After I finished the apron I decided to be courageous and paint her face. At first I thought embroidering her eyes and mouth would be much easier, but I wanted to challenge myself and do what i've never done, paint a doll's face and... just "painting" by itself was a first for me! Sure I've doodled, but that was about it... painting is not completely foreign to me, but it's definitely not something I can brag about!

Her dress and aprong all finished! I added  little heart on the apron.
Remember the eyes I traced onto her face? Well, now it was time to paint it in! After reading tutorials, I had the idea and said a little prayer (Lord knows I needed too. Ha Ha!), grabbed my acrylic paint I had lying around (Black, White and Violet), and a thin paint brush and went to work...

First I traced her eye lashes and outside of her eye with black:


Then moved the white's of her eyes (Guess which color I used for that? Hee hee):


I then decided to give her violet iris, and thus used violet for that part:


And then of course, gave her black pupils:


After that I added 2 dots on each eye towards the top to give her that sweet, dreamy and sparkling eyes!


The next day I spun 100% dark chocolate alpaca wool for her hair, I spun then soaked it in warm water to set the twists, while I was waiting for it to dry (which was pretty quick, as I didn't spin that much), I worked on giving her an over-sized hair bow.

It was very easy to do! I just cut two rectangles of her fabric I used to make the dress, sewed them together (right side in), then turned them inside out and hand sewed the rest of it. I then took two thin strips of the same fabric, and did the same... I then joined both ends together to make a circle and hand sewed it together.


I tucked in the large fabric into the circle and primped it up to  make a bow. I then  lightly sewed the larger fabric to the circular fabric so it would not slip out.
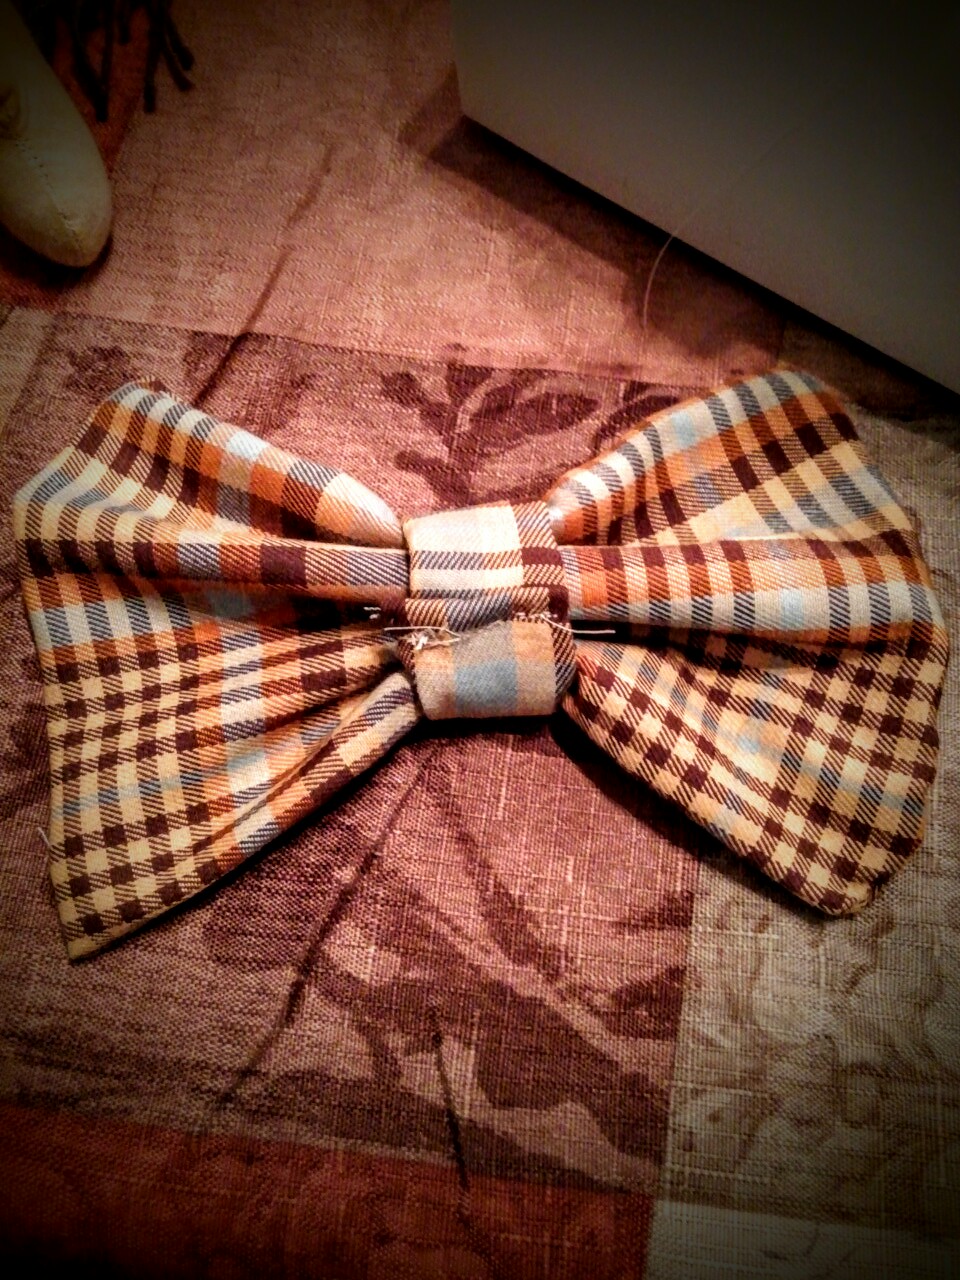

This is the side that was sewn onto the dolls head.

Before beginning her hair, I soaked her dress, apron and hair bow in dark coffee for 10 minutes and squeezed them out, then microwaved them on one of our dinner plates for 1 minute to stain them. Then dried.

Once my yarn dried I measured how much I wanted her to have. I wanted to have two pig tails. So I grabbed a nearby notebook and wound it around as close to "eachother" as I could. Once I got what I wanted I then cut one side and laid it on a leftover muslin fabric. I then used my sewing machine to sew the yarn down onto the muslin. After that I trimmed off the muslin that wasn't needed.


I  placed the wig on the center of her head and hand sewed on the top of her head and bottom to secure it.

To make pig tails, I used one piece of yarn to wrap  her hair around into a pig tail  and tied it down. I then sewed that part of the yarn into her head, and did the other side.


I left her mouth for last, because I wasn't sure  what I wanted her to express... either sweet and shy... or sweet and smiling. I left that for the end after  I put on her dress and applied  her bow (also sewing that to her head). I decided she needed to smile... I am so happy I did that! My mom said, "She looks like she's saying lovingly, "Thank you for creating me!"

Her name is Violet... and I created her with a lot of love and passion!!!


Wednesday, July 1, 2015

Land That I Love


 My parents were born and raised in Mexico, but when they came to the United States, they said that they had to raise their right hand and make an oath to give all allegiance to this country and renounce their allegiance to the country where they were born... they did so, attained their citizenship and from that forward have had such an amazing loyalty, allegiance and love for this country!

 They also met in Yuma, AZ and got married and had 4 children...

I was home schooled and my favorite subject was U.S. History, because I saw the pride and respect my dad and mom had for this country, my mom didn't know very much english when she came over from Mexico, but she made sure all her children knew english first, then spanish as a second language. She learned with us! I remember doing my english and she would join me and learn along with me! When I was a teenager and wanted to learn spanish (I didn't learn to speak spanish until I was about 17, I understood it perfectly but never spoke it as I spoke english with my family only), my mom told me, "Let's help one another... I want to speak perfect english. So i'm only going to speak english to you and you speak only spanish to me!" It did work, until we really wanted to share some juicy news, so it went out the window our deal. Ha ha!

 I remember my dad rented the very long 1970's movie "Patton" and had me sit with him to watch. I remember thinking "Another war movie?". My daddy loved westerns and war movies... he really loved Clint Eastwood and John Wayne, "They are real Americans on the screen, mija!" (he would say).


As I sat down next to him on the sofa groaning that I HAD to watch this war flick that was going to last FOREVER, he popped in the VHS (yup, video cassette.... this generation had no idea how "be kind rewind" was our motto when going to the local video store to rent a movie... Yes, we had to DRIVE to rent a movie and hope to goodness sake it wasn't taken! Block Buster Videos was KING! Memories... ok ok ok get back to my story) and sat next to me and explained with such passion why Patton was an incredible General during World War II... my whining ceased as I listened to my dad explain the kind of man General Patton was.

I quieted when I heard the opening monologue. I realized this man was not playing around and right away had a huge respect for General Patton. I watched the whole movie with extreme interest and remembered my dad would point out certain historical accuracies and what he admired about this or that part in the whole movie...

Then for a report, I was supposed to learn about General Patton and write a report and present it to him. I read about him and when I  wrote my report, I had extreme pride knowing that the General that was hard core about what he did and what he stood for and what he fought for was a red blooded American...just like me!

 Another great movie I watched with my father was the 1996 civil war flick "Andersonville". I was so interested in the movie I read as much as about it going to library as much as I could! My love for my country grew as a young child!


 I was very honored to find out that on my mothers side, my grandmothers brothers both served in World War II. One in the Navy and one in the Army. Both died in battle, my great uncle in the Army died on the battle field as a tanker and he was a Sergeant. At the moment I don't know who they really were (in full details) but in the process right now of finding out everything about them.

My brother at the age of 21 joined the Army for the love of his country. He was there at the very beginning of the Iraq War and also in Afghanistan fighting the Taliban. Amazing stories he brought home. He wanted to return back to the battle field to be with his brothers.

I remember when my brother graduated from the Army (He enjoyed bootcamp. He was that kind of guy, a leader and loves the action and hard work. He made my family proud!) my parents, he and I went to visit Andersonville, and I remember re-enacting "escaping" from Andersonville, and getting shot... he took forever to "die". Ha ha!!!!!

I am also very proud that my husband served in the Navy both active and reserves!


My husband and I when we were engaged! He was either on the island or in Mississippi for Navy duty  and here he was skyping with me and making me blush by wearing a uniform! Ooooo, la la!!!!


Yes, we are nearing 4th of July, but my love for my country is not a holiday kind of passion, it is deeper than that, I love knowing what our founding fathers did to fight to be a new Nation!

I still tear up when I hear the old hymns of our country.

 I love this great and mighty land, and I praise God to be an American!

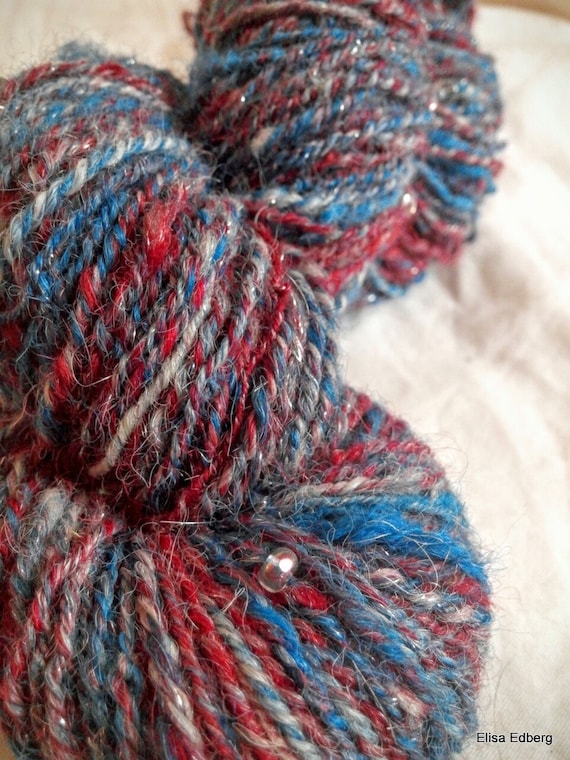
All that being said, I desperately wanted to share this passion I have for my country onto my yarn... Red, White and Blue!

I wanted to make sure my colors were extremely vivid, and added sparkling silver tinsel and spun it adding crystals to mimic the stars on my dear flag!


Hand dyed and hand spun yarn, " Land That I Love "


I loved learning the history of how our flag came to be:


  • Red symbolizes: Valor and Hardiness
  • Blue symbolizes: Vigilance, perseverance, and justice 
  • White symbolizes: Purity and innocence
  • Stars symbolizes: The States 

I am no Betsy Ross but I absolutely LOVED learning about her as a child and have (and continue to have) deep admiration and respect for her!

Some of my favorite Patriotic quotes to share as I end this post:

I like to see a man proud of the place in which he lives.  I like to see a man live so that his place will be proud of him.  ~Abraham Lincoln


We can't all be Washingtons, but we can all be patriots.  ~Charles F. Browne


A man's country is not a certain area of land, of mountains, rivers, and woods, but it is a principle; and patriotism is loyalty to that principle.  ~George William Curtis


Yesterday the greatest question was decided which ever was debated in America; and a greater perhaps never was, nor will be, decided among men. A resolution was passed without one dissenting colony, ”that these United Colonies are, and of right ought to be, free and independent States. ~John Adams

When I die, I desire no better winding sheet than the Stars and Stripes, and no softer pillow than the Constitution of my country.”
~Andrew Johnson

And so, my fellow Americans: ask not what your country can do for you – ask what you can do for your country. ~John F. Kennedy

What we need are critical lovers of America – patriots who express their faith in their country by working to improve it. ~Hubert Humphrey

America was not built on fear. America was built on courage, on imagination and an unbeatable determination to do the job at hand. ~Harry Truman
Land That I Love (100 yards) Click on photo to be redirected to my Etsy Shop.


Sunday, June 21, 2015

Some Beach... Somewhere


"Some Beach... Somewhere."


When I first started dyeing my roving or already spun/plied yarn, I didn't care what colors came out, I just wanted to hurry it up and see what it would look like.

 I remember the very first time I threw in my own concoction of dyes and colors... I was in blissful ignorance! I just wanted the dyes to hurry and dry and once it did... I felt like the heavens opened, God on His throne stood up and began a slow clap... the angels sang a gorgeous anthem of: "Ahhh-ahhhh-aaaaaaahhhhh" as if echoing in a cathedral, the sunshine shone down upon my yarn, and I felt like Rafiki (from The Lion King) when he lifted Simba... I lifted my yarn up to the air and shouted, " Look what I have created!!!!!! I... have made yarn!!!!".

Coming back to reality I was in my kitchen with my dog, Sadie Girl, cocking her head to one side sitting there watching me with a somewhat worried look on her face... perhaps thinking her mistress was going off the deep end. 

Anyways... I was going somewhere with this... oh yes.

After some calming down and practicing my spinning and studying more videos and tutorials, I began to take a step back in everything I did and began to take careful thought into my colors, "What color would go with what? What design am I trying to portray?"

 I wanted to create a story behind my yarn!

My first story to back up my yarn was: Inspiration   

When I was working on Inspiration, I began to realize that my yarn should have a story behind it, because behind every great craft is a passion and behind each passion is a story ready to be told... Great or not, there is always a story to everything!

 After I finally finished Inspiration, I began to miss the ocean...


Photo by Elisa Edberg overlooking Downtown San Diego from Coronado Island


 I was born and raised in San Diego, California. I have many memories of going to the beach with my family, and many memories of going to "my beach" (located in La Jolla Shores) and sitting there doing a mini bible study, crocheting or knitting, even some short writing... The ocean inspired me greatly, and calmed me when it felt like my world was about to crumble around me!

 Living in Tennessee, there are rivers and some lakes, but nothing can replace the ocean!   

 
Photo by: Elisa Edberg


 I would like to share with you some memories surrounding the ocean...

I met my beloved on a free Christian dating site... Ya, I was the type that said, " A dating site??? Aren't they for... like... losers?", my brother met his wife on a christian dating site and he told me, "Just try it! If it doesn't work out then you can discontinue using it!", I always gave him a hard time saying, "No one wanted you so you had to go online huh?" Of course, he had a stingin' come back, "Uh, aren't you going on one too? So what does that make you?"... touche, dear brother... touche. Though I wanted to say, "Uh... That was wicked rude." Ha Ha!

 With my mama's encouragement (and my daddy trying to discourage me... he wanted me to be single forever. I was his little girl! Ha Ha!), I decided to go online and try it for just one week... after signing up, within the first hour... this hottie hot hottie who was living in Hawaii messaged me... and so... it began...

One memory surrounding the ocean during my husband and my exciting and often interesting romance was this:


Our very first photo together the day before we began our courtship that lead to getting unofficially engaged 2 weeks later, properly engaged a month later, that lead to our marriage 5 months later! How I love my beloved!
 

We sat on a rock that was on the sandy beach, the gorgeous breeze mixed with warm sun was delicious that made you want to take a nap right there and then! I loved seeing the alcatraz in formation barely touching the water as they flew on by... In the waves you can see some sea lions splashing about and popping their heads out of the water curiously watching the surfers... 

 
Photo by Elisa Edberg, La Jolla Beach


Dustin and I sat in silence soaking in the beauty of God's creation, he then turned to me and spoke, "Elisa... will you be my girl?", I turned to him and said, " ... No. ..." Don't yell at me, there is alot to the story, but i'm just giving you the odd yet funny part! 

Let's say that whole day (Dustin was just staying for a 24 hour date. He flew over night from the island and was leaving the following morning all to win my heart...) he wasn't giving up, this was the words he uttered (after I denied him for the 3rd time) that has been our marriage's motto:  "The day is not over yet".

When I walked him to the security line at the airport the next morning, he cupped my face right before passing the line (holding up the line behind him) and very gently brushed my lips with his (not a kiss at all, a very light brush I barely felt that brought shivers all over my body!) and whispered, " I don't want this to end." and crossed the line with me standing there in shock!

That did it, I was head over heels at his constantly chasing me and wouldn't let me go and his character and godliness, and just who he was! I texted him right away and said, "If this is a serious relationship, i'm all in.".


On Ewa Beach looking toward Honolulu.  Photo by Elisa Edberg


2 weeks after that day, I flew to over to hawaii to visit him (I stayed with a lovely couple from his church), and he took me to the North Shore (on the island of Oahu) and there I saw wild sea turtles surfing the waves! They were a lovely earthy green color and were beautiful! The water there was a gorgeous turquoise, with a hint of green when the sun hit it right... during the sunset there was some orange and reds and purples hitting the water... oh the ocean was so beautiful!!!! 


Photo by Elisa Edberg


When we drove back to Honolulu from the beach, we decided (in his little car) to get married that following September (5 months later)... and I even put it on my calendar!!!! Oh, what funny and wonderful memories!!!!!


Photo by Elisa Edberg


But my favorite memory was when we lived in Hawaii after we got married... We lived in Honolulu just a 10 minute walk to the beach. We would go often to swim during the sunset, but many times we would drive to Pearl Harbor military base when there was a full moon to a parking lot that was right on the ocean and there we could watch the airplanes take off... we would play our wedding song "Give me a Song" played by the Artis Family (who are a family band from the island, and a complete blessing to us) and dance in the night air with the moon shining down and the ocean gently splashing against the wall below... Those are memories that I will never forget when thinking about the ocean!


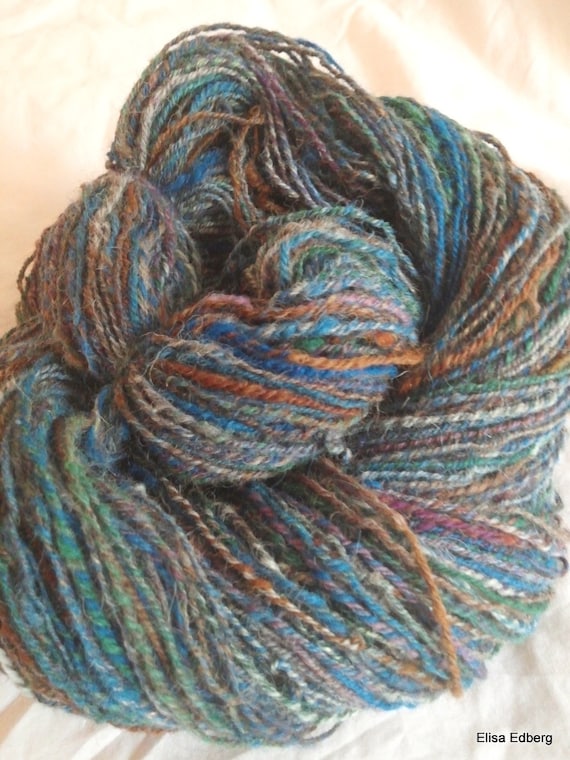
Now, coming back to the colors I was next to choose for my yarn, I wanted to theme it: Some Beach... Some where.

Remember that song? 


This song makes me giggle, but it's true! Whenever you are going through a bad day, don't you close your eyes and think "Some beach... some where", I know I do! 

I wanted to mimic the colors of the ocean so that whoever makes something to wear out of it or just creates something out of it to decor with, can bring the ocean with them!

My colors are not the typical: light blue with white. 


Photo by Elisa Edberg O'ahu, Hawaii


 No, I wanted a deep blue one would imagine seeing whales and dolphins pop up playfully, and greys that would mimic the turmoils of waves after a storm, the greens reminded me of the sea turtles gracefully swimming, and you would be able to see them under the water through a wave because the water was that clear!

I wanted to add some purple that reminded me of the sun hitting the water just right during a sunset, and the earthy silk blend that reminded me of the sea weeds that was scattered on the sand and drift wood...


Photo by Elisa Edberg


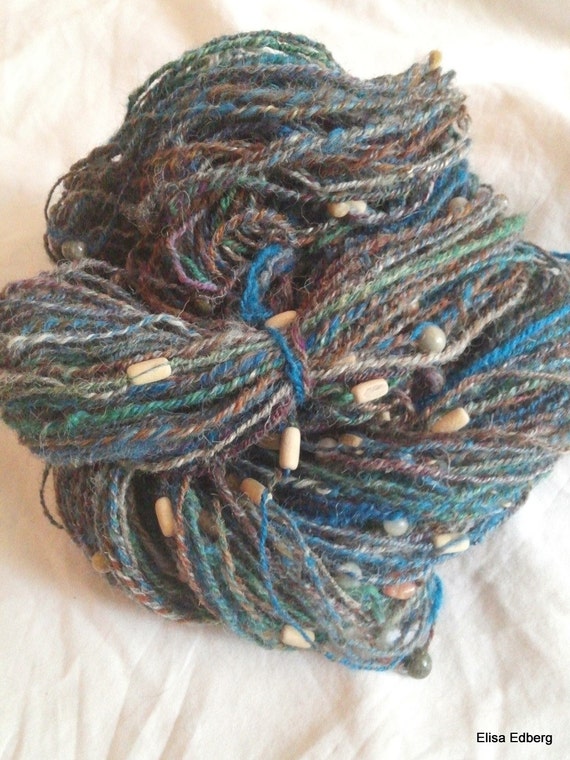
After single plying all this gorgeous colors, I began to navajo ply BUT... I did something different!  I added beads to my yarn! Why? I wanted to learn how to do it, and second, I wanted to add something that would remind me of sea shells and smooth earthy colored rocks you would see at the beach!


Photo by Elisa Edberg


Oh! I had such memories of my big brother, myself, mom and dad and my grandma (my mom's mother) going to the beach and picking up sea shells and rocks! Haha, I remember my brother "saving" my grandma, because she was sinking in the sand with the current of the water, and he helped her out (he was maybe 12 at the time)! Ay yay yay! 


Coronado beach... and i'm being goofy as you can see!


I had amazing fun painting... with my yarn! These are the colors I used: 


It looks like a mess, no doubt... and you're probably wondering, "How are all these colors gonna look like a beach themed yarn?" ... 

The results were beautiful:

When I make my rolags, I feel like i'm painting! And all these painted colors blended together comes up with something beautiful!
    
 In my next post I will explain a bit more how I added beads and add a video! 

Thank you for allowing me to share with anyone reading this my joy in making this special yarn! Making a memory with your yarn... now that is special!     
Some Beach... Somewhere. Click on photo to be redirected to my Etsy Shop

Some beach ... Somewhere (bead edition) click on photo to be redirected to my Etsy Shop


Thursday, June 4, 2015

No blending board for rolags? No problem

I've been spinning on a wheel since Christmas Day 2014, have been spinning on a drop spindle since October 2014, and became interested in spinning my own yarn (and obsessed with blogs, articles and youtube videos on anything to do with spinning fibers/dyeing fibers) since September 2014!

Since December I have been enamored with this particular photo I took off from pinterest:


NOT MY YARN or WORK... just showing a photo I took from pinterest that started my quest to make something of like quality!

After I saw this picture, I believe I stared at it for 5 minutes straight... it's not just the colors that captured my attention, it was the way the colors were sporadic and sort of random but yet all in order... I can't explain it, but it was the most beautiful yarn i've seen! I knew right there and then, that this was my goal, this was the kind of yarn i'd pride myself on making!

 I searched the internet and asked other spinners how to get this kind of quality in my dyeing and hand spinning, majority I asked and searched purchased the rovings already dyed or already batted together on a drum carder and all they had to do was spin it. I didn't want that, I wanted to learn how to do it from scratch!


 So my journey began (since January when I got my dyes and raw fleece from tunis sheep and alpaca) to get this kind of yarn from my own fleece, dye and wheel!


I tried dyeing the roving with a color here and a color there, but it all looked too "tie-dye" and spinning it, it looked really nice, but it wasn't what I truly desired! The colors were uniformed perfectly and I didn't want that at all...  So, I tried again!

This time, I tried spinning my roving naturally and then dye afterward sprinkling the colors I wanted here and there...


Then I spun another bobbin of singles and dyed here and there and 2 plied these colors together, and it came out looking lovely! But no what I wanted!!!!!

I proceeded to try spinning the roving (natural color) and try this same concept again, but I wasn't careful and ended up blending all my dyes together... but it came out as a side blessing because these colors came out!!!


I was so shocked and pleasantly surprised and was so pleased that I remembered what dyes I put in and the amount and for how long (and of course wrote them down for future reference!), see? Accidents can be the best thing that can ever happen to you! ;)

But still, I was determined! I would not stop until I got the yarn of my dreams that I made myself...

I kept on looking online and asking around, but so far I wasn't getting anywhere new. One day, I was lying in bed and couldn't sleep (my husband can sleep so easily! I envy him... my mind is constantly thinking creative thoughts I can't turn it off sometimes! Ha ha!), so what do I do while i'm lying in bed? Go on pinterest and look at handspun yarn, dye tutorials, rustic handmade items and dream of our future land, home and sheep on our tiny homestead!

While browsing the internet I came across fiber artists using drum carders and making beautiful batts, and others using large blending boards to make rolags. I watched with longing and admiration as they blended all these beautiful colored fibers on the blending board and roll it tight to make rolags... whoa... wait... "THERE IT IS!" I gasped and shot up in bed as my beloved moaned and groaned and said, "Baby, watching more spinning stuff?" and dosed to sleep... he knows me well, even while talking in his sleep. Ha ha!

I needed to blend these colors not on a hackle (I tried that multiple times and didn't come out exactly as I wanted it), but on a blending board and roll it in rolags! Then I slumped down in my bed realizing, wait... I don't have a blending board, or one of those fancy dowels or sticks to roll up a rolag anyways... Sigh...

Next morning, I was taking sadie girl for a walk (our big goofy blockhead of a pup!) not thinking much about my spinning adventure (sometimes I have to take a break from creativity!) listening to my youtube playlist (Zac Brown Band, Josh Turner and some Blake Shelton), when in the middle of our walk it dawned on me, I don't need a huge and expensive drum carder or blending board with it's fancy brush and dowels! I can just use what I have on me! Until I have enough money, I can just improvise!

 I rushed us home (sadie girl not happy at my interrupting her sniffing everything in sight) and took all my dyes out and began dyeing solid colors with each 4 oz. or so of my tunis/alpaca. No fancy dyeing here and there, just a mixture or colors blended to give the roving what color I wanted. I did 5 batches of the colors I wanted.


Then I looked around in my crochet and crafting area for anything that would be useful for a brush and 2 dowels (as I had my hand carders which would serve as my blending board). I found two old crochet hooks and a clean old paint brush!


So I began to blend! I started out with the forest green and added it to my carder sporadically (it wasn't entirely covering the carder perfectly) and brushed it down with my clean paint brush in order to add my other colors!


I loved adding a roving that was not dyed at all to give it the white I wanted! I just placed it in 2 spots on my carder.


In between the natural color I added another (in 3 spots as to not overlap the white just yet) .


I added over the white another color... see what i'm doing here?


With each application I brushed the fiber down...


I only used a minimum amount as I didn't want to overwhelm the bristles!


For this application (the purple) it wasn't my own fibers, but leftover merino I purchased when I first was learning how to spin on my wheel! No wasting here!


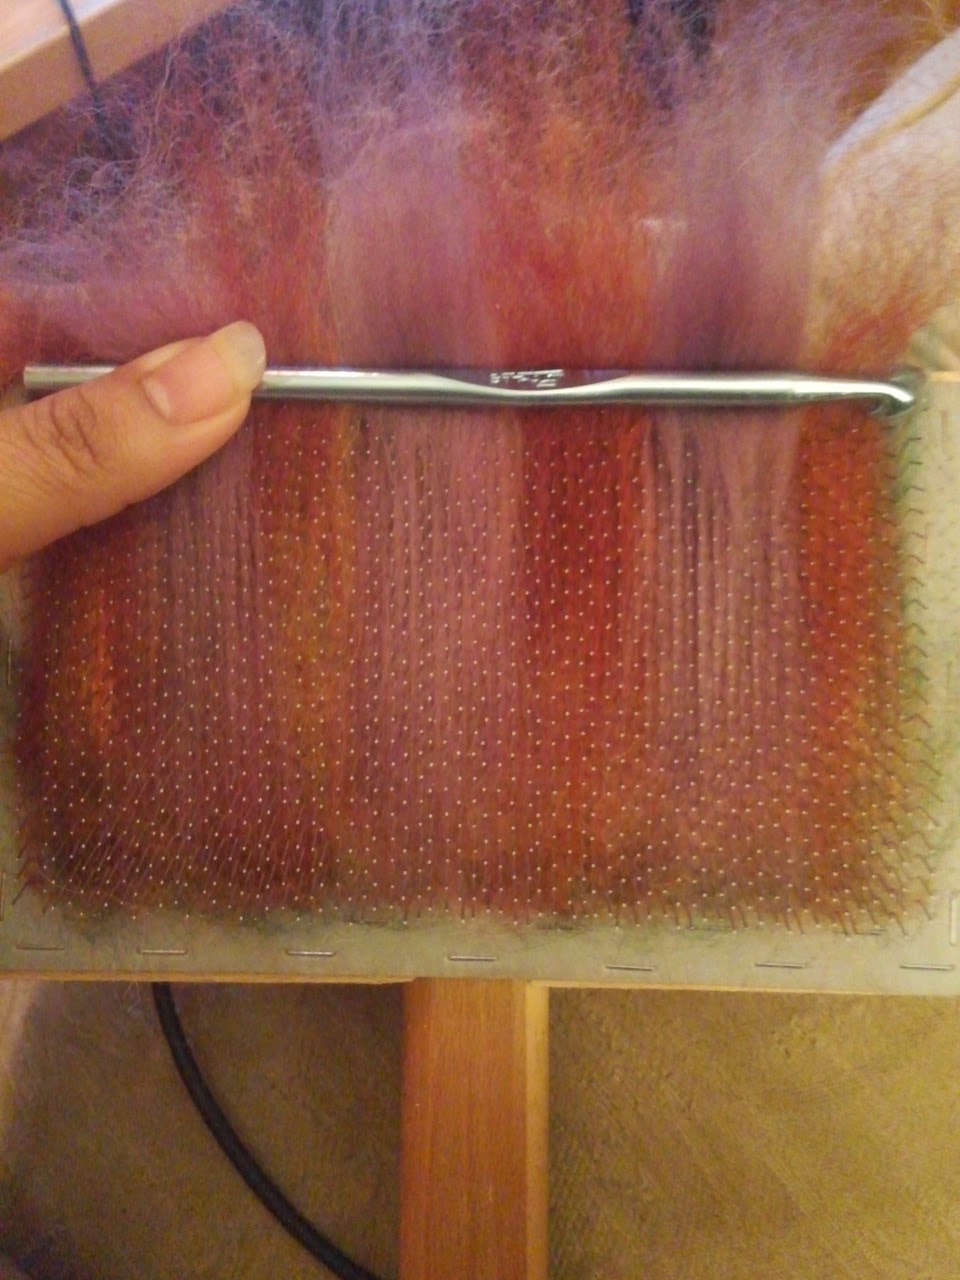
Now it was time to use my dowels... er- crochet hooks! I placed one hook behind all my fibers on the carder, and the second in front, they were not placed evenly, but one was longer than the other. I then rolled the hooks down, and drafted with each roll gently...


The reason why I had one hook remain longer than the other was when I was done rolling them, I can find one hook and push it out of my rolag and the other hook always finds the hole I pulled the other one from!


 This was my rolags (not entirely perfect but they did the job!) that I made with just 2 hand carders, old paint brush (clean) and 2 crochet hooks!


I spun in this same pattern. Green-Red-Green-Red, etc...


 I  decided I didn't want just "green" based yarn so I made another batch of rolags with a "wine" color like foundation and used the same colors I used for green but I added them to my carders backwards so it seems like the colors are slightly different which added a lot of beauty to my yarn! 


Below is a video I made (with the help of my beloved) that will detail how I made this gorgeous rustic rolags.


After spinning singles for a while, look how absolutely gorgeous the rolags have spun on my bobbin!!!! After 4 months of mistakes and never giving up, I finally got it, I finally got the results I absolutely wanted and I am so HAPPY!!!!!!


Then after I finished the very fine singles, I then plied it (Navajo ply). I just have to say, Navajo ply is nothing to run away and hide under your blanket! It's exactly like crocheting chains, except with your fingers! In my video, there is no voice as I have learned (self taught by watching youtube videos) that I learn better by muting sound and completely watching the movement! If you are that kind of learner, then you will enjoy... I hope. Ha ha! 


After 3 weeks of dyeing, blending, spinning and plying I got the yarn that I have worked so hard to attain!


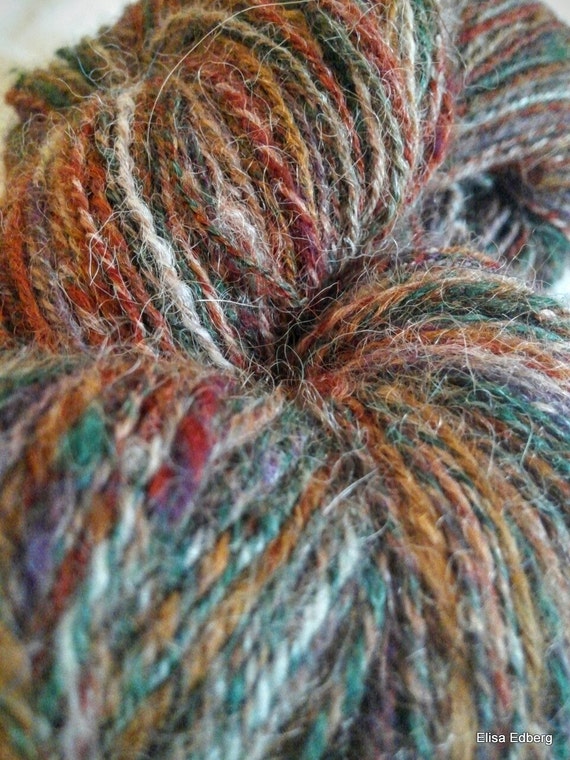
I named this yarn: Inspiration. 


Update:


Right after taking photos of my finished yarn I dropped it twice on accident and each time it snagged and it became a tangled mess! 


Oh, I just wanted to cry!!!! 435 yards of complete tangled messiness! But I was not about to give up on putting this to skein once again! So for the past 4 days I have been very slowly and carefully detangling my gorgeous yarn, and so far I am almost done!!!!


 One thing I will say, i'm actually glad that happened. Why? So I can practice patience and a peaceful attitude! It also helped me appreciate all the work I put into it and to not take for granted that I have the blessing of being able to stay home full time as my darling husband works hard for me to do so and fulfill my dream! I love that husband of mine!

I hope you all have enjoyed this post as I have enjoyed writing it, I am so thrilled to share with all who is reading this!


Inspiration (230 yards) click on photo to be redirected to my Etsy Shop