|
| Violet |
There is something about being getting married.
When I was a child to young teen years, I was quite a tomboy. I disliked craft making, I hated to cook, and I only wanted to play soccer. Soccer was my idol at that time and I only wore pants and t-shirts, you wouldn't catch skirts or dresses on me!
My mama was (and still is) extremely creative! She made dolls, sewed clothes, decorated our home in the most cozy fashion that any time someone came into our home they would pause and drink in the atmosphere she created with their eyes, nose (her home always smelled of fresh from the field lavender in the spring and summer, and pumpkin and cinnamon in the fall and winter), and spirit/soul! I always had a deep admiration for my mother's creativity... and little did I know that I had that same creativity.
I didn't allow my creativity to flow because I was somewhat shy with it and didn't think it was much... How I wish I could go back in time and slap myself for not allowing myself to be all that I can be... no not in the Army, i'm too much of a wimp to be yelled at in bootcamp. Heehee!
I think I would react like that spoiled man child in the hilarious skit (video) by Abbott and Costello if I ever had to join the Army! I'd react like he did at 5:45 and 6:12 (minute mark) if I was ever yelled at by a drill sergeant! This video is VERY low, so please turn up your volume! Whenever I watch these type of videos I remember fondly my brother and I would re-enact their skits down to the dot!
Anyways, at around turning 18 I went from a tomboy to complete femininity over night! I wore makeup, made my hair look nice and I wore girly clothes and my confidence boosted higher and higher... but still, my creativity was at an ultimate low.
Little by little I realized I had a very strong sense of creating something out of "nothing" whether it be a skit, a song, playing music on my guitar by ear (I didn't know how to read notes), scrap booking, etc... I did have times where my creativity scared me, because I didn't know how strong I had it!
It was after I got married that I decided to allow my creative juices to flow freely!
I decorated our first apartment together (In Hawaii) in a Moroccan/Safari style. That apartment was extremely tiny and it looked like an asylum when it was empty, very cold and not very cozy! After I finished decorating we invited a friend over who brought a coworker to visit for a short while, and when she came in, she paused at our front door and looked around slowly and said, "You can tell a woman lives here. There is such warmth and beauty here." That made me smile so big!
 |
| My first home as a married woman leaving my parents home that I decorated myself! |
 |
| I loved this small area! I felt like I was in Africa! |
That was a first for me,to decorate my own home as the Lady of the Home! That wasn't a first, I learned shortly after to crochet, and caught on very quickly that immediately I began to crochet my own designs:
 |
| Fingerless glove I crocheted with my own pattern |
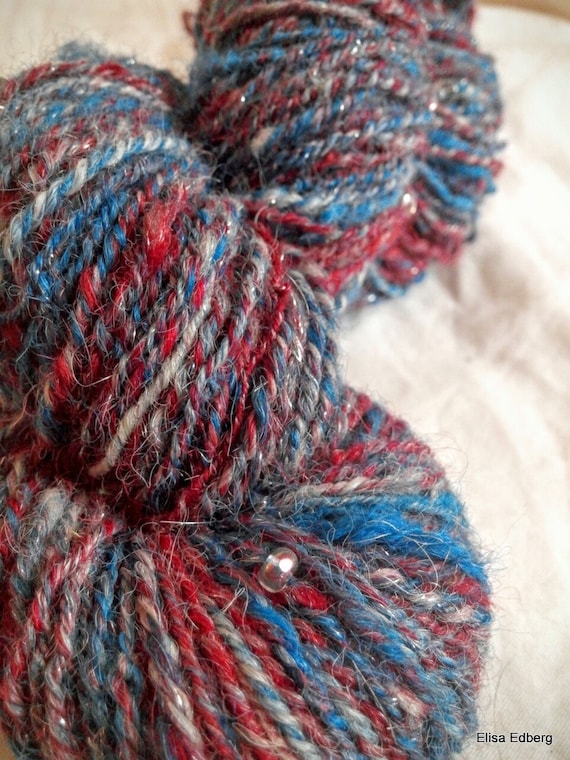
Another first for me is spinning my own yarn!
 |
| My very first blended roving made on a blending hackle my husband and my dad made for me! |
 |
| my very first yarn I ever spun from my roving from the picture above! |
There is always a first for everything, especially if it's something you are so interested in! I love anything country, rustic, Americana, handmade with love and warmth and a touch of country pride and American made! So I began to fall in love with Prim Dolls! It has that charm that I absolutely adore! How dearly I wanted one, and would sigh and think, "I wish I could make one."

 |

Wait a minute... why can't I?
I have a sewing machine... it was gathering dust. I tried to be interested in clothes making, but I lost interest extremely quicky, and I only sewed if I needed to hem something up... like a button.
But I sincerely wanted to make a doll... and so I went to the back room and brought out the sewing machine, blew off the dust, stared at it and stared at dolls like the photo below I would gaze at in admiration on Pinterest and wondered... what now?
So I watched and read as much as I could take in and understand. I made a list on what I needed to make the body of my doll and away I went to Joann's to shop for some muslin fabric... I was in luck! The fabric I got was pure white and extremely cheap per yard! I already had black alpaca wool doing nothing but taking up room in the back room to stuff the doll, so I got what I needed and when I arrived home I began.

Of course I had no idea what I was doing, so I wanted to be as simple as possible and create from the heart... Just like food, if you create while anxious, uptight, upset, with a negative or worrisome attitude, it will come out in what you are creating! No matter how my doll would come out, I was going to start it out with love, patience, warmth, gentleness and kindly work with my fabric!
I traced out a simple body, with two legs, and two arms. I already knew what she looked like in my mind, but drawing it down took me a very long time. I first drew her on paper (it took me a LOT of paper to finally get the body right). I cut out the tracings and traced her again on the muslin (double layered) with a simple pencil I had.
I then pinned the tracings down before I cut the patterns (not perfectly as I was just going to sew the patterns together and once done turn them inside out.
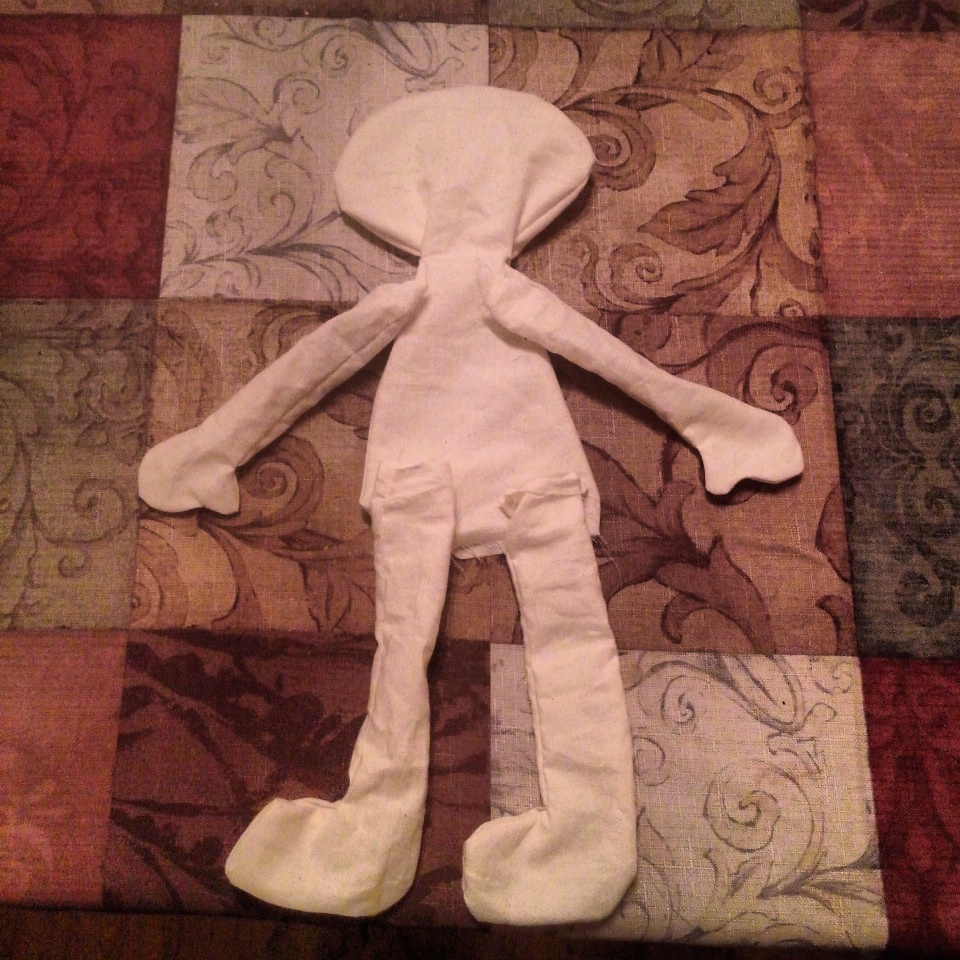 |
| The doll isn't stuffed or sewed together in this photo, I just placed the patterns together to see how it would look. |
After I sewed the parts, I got some leftover coffee and soaked the fabric in it for a good 5 - 8 minutes. After soaking, I wrung it out and put in microwave on high for 1 minute (keeping an eye on it so the fabric wouldn't burn) for the coffee to permanently stain the fabric.
After that happened and everything was completely dried, I began to stuff the doll. Not too tight and not too loose, just enough! I used raw alpaca wool as it doesn't have any lanolin, so it's not greasy at all (or else I would have washed it beforehand), it's just dusty (which I dusted off beforehand) and extremely soft... and there was something comforting and country that I like about the smell of raw alpaca wool! How primitive can one get? HeeHee!

After stuffing as much as I could, I sewed up the doll (the arms I did by hand) and I absolutely loved my doll already!!! I was searching around online for ideas on the eyes and nose (the mouth I left for later) and found many ideas,so I incorporated ideas with a tiny bit of mine and began to practice drawing eyes and noses on scrap paper to see what matched her.

You have no idea how much scrap paper I have tossed! But it was so much fun and it built my confidence to start designing her face... because Lord knows how completely scared I was to start directly on the doll and mess up!!!! So before I began designing, I took more muslin fabric, made a quick circle, sewed it, stuffed it and sewed it up tight to practice on it as if it was my dolls face!
I practiced on both sides of the practice doll to get different ideas... I didnt want a completely flat face, I wanted an almost 3D nose. So I began to study on needle sculpting online! After getting the idea I took a simple sewing needle (I didn't have a doll needle) and fishing line (as you need a strong thread. I didn't have crochet thread, or quilting thread, but I did have a thin fishing wire that would disappear into the fabric!

I needle pointed 3 type of 3D noses: on the top left is just simple line you would expect on a prim doll, below that was a "W" nose that I kept the base open to have a slight line go up toward the eyes... and after that I closed up the base to have just a button nose (top right). I liked the "W" design better.... so I got to work... I took a very deep slow breath, and prayed (I did really. haha I was that nervous!) and very slowly and lovingly got to work!

It came out PERFECTLY!!!!!After I did the nose, I then extremely carefully traced out the eyes on the doll and look! This was the exact face I wanted!!!! I showed my beloved and he said "Awwwww! It's so oochie-boochie-boo-boo!" That is what I say when I see something cute or a darling baby! Ha ha I rubbed off on him!
Then it was making the dress time...dun dun dun duuuuuuuuunnnnn...
I kept looking online for some ideas or free patterns. The only pattern I found that was simple enough to be on a "How to make a prim doll dress pattern for dummies" was literally just something like this:

After staring at my paper traced dress, I decided to brave it and take out my fabric. It was an old bed sheet (washed of course) I purchased from Goodwill for only $2. So away I traced (with a pencil) on my fabric with the help of the pattern on paper.

It looks simple enough right? All I have to do is sew on the wrong side of the fabric and slip the doll in. I did that, and it did work... but I didn't like it. I realized that we may not notice it, but when someone takes their time and carefully and lovingly sew something like a dolls dress, they don't do things the "easy" way (like sewing the dress in one smooth motion), they sew the bodice then the sleeves seperately. So I decided to take my time and separately sew the bodice from the sleeves.

Majority of the time I used my sewing machine, and when needed I sewed by hand. You may find this hard to believe, but i've never hand or machine sewn anything creative. I only sewed by hand when fixing a clothing item or needing to add a button. And on the machine I knew how to sew a straight line seam if I REALLY had to, which was never.
My mama taught me how to use the sewing machine as a child to teenager, but she literally had to make me sit still and sew. Like I said before, if I could avoid it (back then) I would! My mom finally gave up because I had absolutely no interest, but not without instilling in me knowledge on how to use a machine, because she knew... my mom knew I would need all that teaching one day. Isn't she wise?
Shout out to you, Mami!


After the dress, I decided to make mini dress samples and an apron sample and add crochet border to the hem and see how it would look coffee stained.
I used two yarns: a 50/50 merino/mohair and a simple crochet thread.
 |
| Before staining. |
 |
| After staining |
After I saw which yarn looked better with a coffee dyed dress, I began to add a scallop border to my dress with a picot to add some classic flair to it.
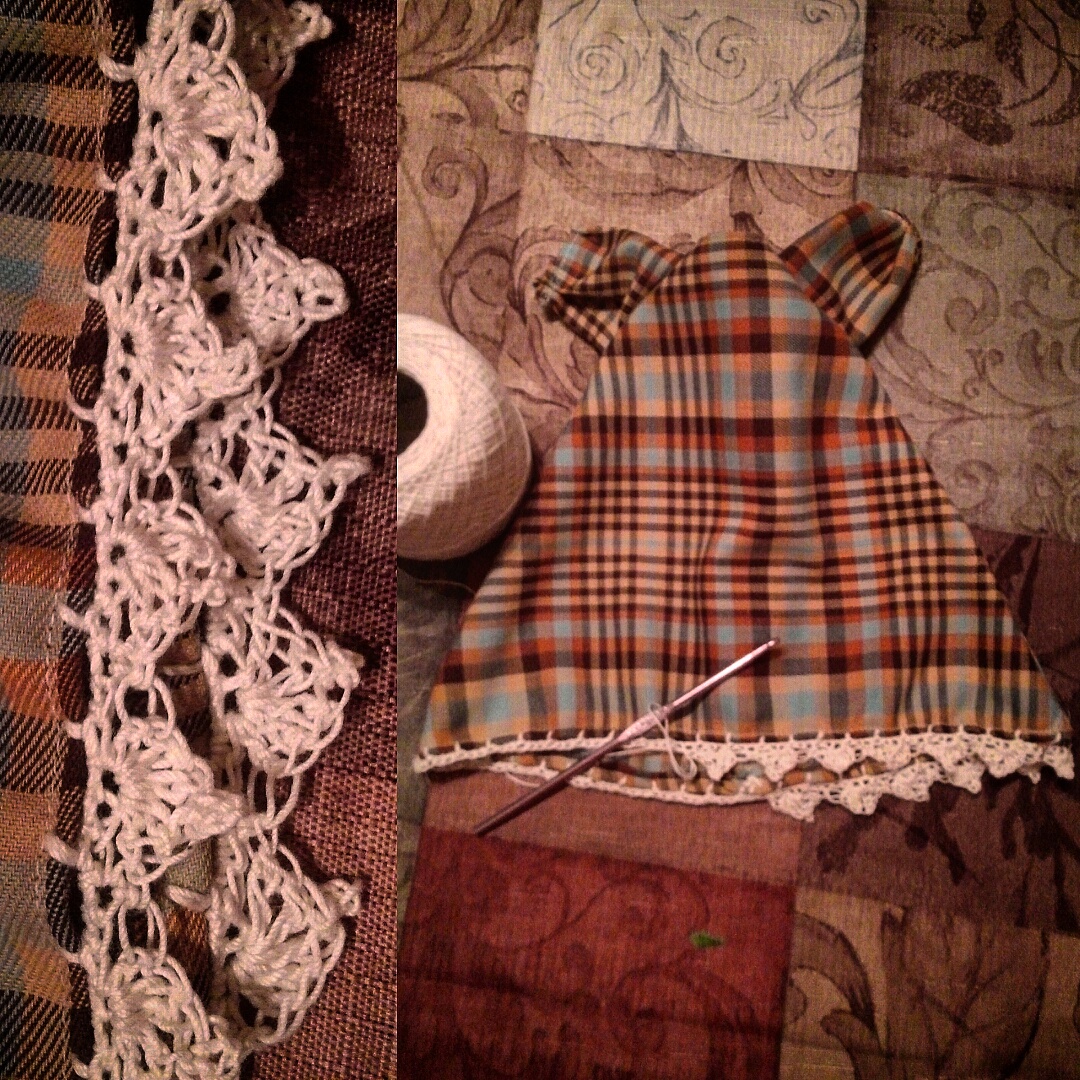
Then it was time to make the apron, now that was very easy! But still, I wanted to take my time and measure and make sure it looked even!

Making the apron strings was super easy to sew! I just sewed on the wrong side in a straight line and bam, was done... oh... wait... I have to turn it wrong side in. Dang it.
Ok no problem, it won't be too hard, right? Ha!
So I tried just trying to use my fingers, and that didn't work, I tried using a pen... nope. I tried using my crochet hook... It was mocking me... So I tried slapping it on everything I saw and choked it with all my might and threatened it that I would feed it to Sadie girl if it didn't cooperate (which Sadie's ears was perked up with a look that said, "You serious? Don't play.")... That also didn't work, for some odd reason.
I sat there and finally came with a brilliant idea! It was so brilliant that I had those strings wrong side very quick! All I needed was the fabric i'm working on, tapestry needle, crochet thread, and tweezers:

I took my tapestry needle and tied a knot at one end:

I then went through (on one end) the string with the needle:

I then pulled the thread until I hit the fabric. then with tail end of the needle facing down, I pushed the needle all the way to the opposite end of the string:


Until I reached the very end, and grabbed with my tweezers the crochet thread at that end and began to slowly and gently pull it while folding the rest of the fabric over it:

Then once I can see the crochet string (about 1/4 after folding inward) I just grabbed the string and pulled and helping fold the fabric along the way, and it pulled itself inside out!

The longest thing that is delaying from finishing my doll so far is embroidering. At first, I just wanted to keep the apron simple, maybe cut out a heart shape fabric and sew it on, but I dont want my doll to look extremely simple! I want her to look warm, sweet and complete! So I decided to embroider words onto it...
I've always loved the song "You are my Sunshine", and after getting married, my husband and I would randomly break out singing it together... it was our little way of showing each other love wherever we are! One day we saw a video of an older gentleman who was in so much pain in the hospital that he felt as if he should die from the pain he was feeling (thankfully, he is fine now from what i've read), so he asked his darling wife to come close to him and they both serenaded eachother "You are my Sunshine", it was the most intimate and precious thing I beheld! That this song became even more precious to me when my husband and I sing it to each other together, so I decided to embroider some of the words onto it to add a piece of our love onto the doll!
 |
| I'm still in the process of finishing it up, I still have to embroider "Away" but you get the idea! |
 |
| Her dress and aprong all finished! I added little heart on the apron. |
First I traced her eye lashes and outside of her eye with black:

Then moved the white's of her eyes (Guess which color I used for that? Hee hee):

I then decided to give her violet iris, and thus used violet for that part:

And then of course, gave her black pupils:

After that I added 2 dots on each eye towards the top to give her that sweet, dreamy and sparkling eyes!

The next day I spun 100% dark chocolate alpaca wool for her hair, I spun then soaked it in warm water to set the twists, while I was waiting for it to dry (which was pretty quick, as I didn't spin that much), I worked on giving her an over-sized hair bow.
It was very easy to do! I just cut two rectangles of her fabric I used to make the dress, sewed them together (right side in), then turned them inside out and hand sewed the rest of it. I then took two thin strips of the same fabric, and did the same... I then joined both ends together to make a circle and hand sewed it together.

I tucked in the large fabric into the circle and primped it up to make a bow. I then lightly sewed the larger fabric to the circular fabric so it would not slip out.
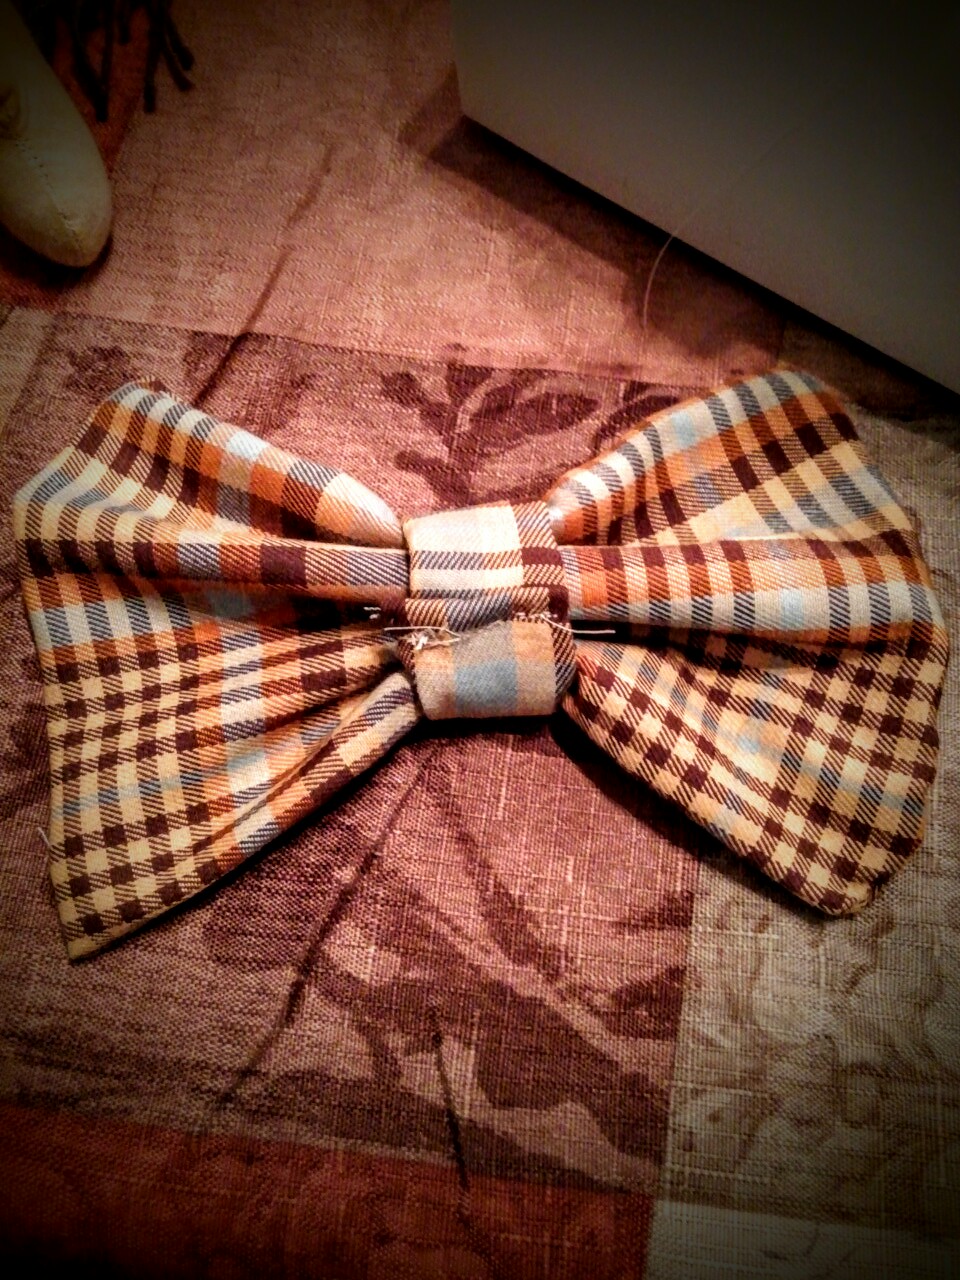 |
| This is the side that was sewn onto the dolls head. |
Before beginning her hair, I soaked her dress, apron and hair bow in dark coffee for 10 minutes and squeezed them out, then microwaved them on one of our dinner plates for 1 minute to stain them. Then dried.
Once my yarn dried I measured how much I wanted her to have. I wanted to have two pig tails. So I grabbed a nearby notebook and wound it around as close to "eachother" as I could. Once I got what I wanted I then cut one side and laid it on a leftover muslin fabric. I then used my sewing machine to sew the yarn down onto the muslin. After that I trimmed off the muslin that wasn't needed.

I placed the wig on the center of her head and hand sewed on the top of her head and bottom to secure it.
To make pig tails, I used one piece of yarn to wrap her hair around into a pig tail and tied it down. I then sewed that part of the yarn into her head, and did the other side.

I left her mouth for last, because I wasn't sure what I wanted her to express... either sweet and shy... or sweet and smiling. I left that for the end after I put on her dress and applied her bow (also sewing that to her head). I decided she needed to smile... I am so happy I did that! My mom said, "She looks like she's saying lovingly, "Thank you for creating me!"
Her name is Violet... and I created her with a lot of love and passion!!!